2

DIY Minnie Mouse Costume for Toddler

Hi!

I recently had a chance to do a costume and this time I was extra excited because this would be the first costume for my younger daughter Anjana who is two years old.

The playgroup to which she goes put up a message on the notice board a few days back that 14 November 2016 would be a fancy dress day and the theme was cartoon characters.  Minnie Mouse was the obvious choice because Anjana loves Minnie Mouse and the costume was relatively easier to make than others like Daisy Duck or Ariel or Dumbo. As usual, I googled images of Minnie Mouse costume for toddlers to get a fair idea of what sort of a frock Anjana would need apart from the Minnie Mouse ears and bow.

Materials used:

  • A hairband
  • Glitter foam sheets (black and red)
  • A black Sharpie
  • A pair of scissors
  • Glue
  • Print out of a silhouette of Minnie Mouse face for the bow
  • A small piece of cardboard (2 inches in width, 4 inches in length)
  • Duct tape

materials-used

Step 1: Mark this shape (twice – one set for each ear) on the glitter foam sheet (black) which would form the ears and cut them out.

minnie-ears

Step 2: Place the pieces on the top of the hair band in such a way that the rectangle between the circles would rest on the band.  Place the ears with a gap of about 3 inches between them.

minnie-ears-placement

Step 3: Glue the pieces together.

minnie-ears-glued-on

This is where I realized that I had made a mistake. The ears were drooping down (I was so upset hat I did not take a picture of the droopy ears) because of two reasons:

  • The glitter foam sheet was not firm enough to stand upright
  • The central rectangle for too big (bigger than the width of the hairband)

So, a quick change of plan because I lost my patience or enthusiasm.

  • I removed the ears from the hairband and cut the central rectangle out from both pieces.
  • I cut out two strips (1 inch wide and about 4 inches in length) of cardboard (from an Amazon delivery box).
  • The cardboard strips were place on the hairband similar to the image below (again, no pic, thanks to my impatience).
  • Apply glue in the centre and the edges of the strips. Fold them together so that the edges are aligned and the centre rests on the hairband. In a way, they would resemble like horns protruding from the hairband.

hairband-with-cardboard-pieces

  • Since the glue would not dry immediately, so I secured each strip with duct tape. Now, the cardboard strips stood up on its own.
  • As the glitter foam sheet was lightweight, the circles were glued on to either side of the cardboard strips so that it would now look like Mickey Mouse’s ears.

Step 4: Cut bow to shape and place it on the red glitter foam sheet. Trace the outline and cut the bow of the red glitter foam sheet. Use the Sharpie to add details to the bow.

minnie-mouse-bow

Step 5: Glue the bow to the ears on the hairband. My glue did not work well to hold the glitter sheet (because the surface was not smooth due to the glitter), so I used some duct tape on the back of the bow to secure the bow to the ears. I did not align the bow to the centre, so it is a bit to the right, but not too obvious. So I can live with it.

My daughter has a cute pink frock with a Minnie Mouse printed on it and a pair of red colour shoes with a bow.  Here is our little Minnie Mouse:

minnie-mouse-2

I know, she does not look very happy 😦

One more pic:

minnie1

3

Goddess Saraswati Costume

Hello everyone!

This is a post on how a costume of Saraswati was put together for my 5-year-old daughter Santoshi .

On the last day of school before the I Term holidays, Santoshi woke up earlier than usual just to tell me, “My teacher asked me if I would like to dress up and go on stage. I told her that I’d love to”. I did not think much about this, though the teacher had promised all parents that all the students would get an opportunity to perform in one way or the other during the academic year.

Strangely, the school informed us about ten days in advance that she has been chosen but did not reveal more information until the day before the show.  I was excited because Santoshi likes to dress up and I love experimenting new things/ ways of doing things.  With the limited information that was provided to us, we needed a white silk saree with gold trims and designs, a bright coloured blouse in contrast to the white saree, a veena, some jewels (crown, necklace, bangles) and face make-up – eyeliner and bindi and, may be, a dash of lipstick.

White saree

  • Santoshi did have a set of off-white skirt and blouse which may be acceptable by the school but I was not happy with that. So, I started looking for all the white coloured clothes/ fabrics that were at home. I had ordered this for myself and I still had the fabric for the salwar unused, looking pristine white. With more than two metres in length, it was the best choice for the white ‘saree’.
  • Santoshi still needed a white skirt to wear underneath. So, I bought a thin white dupatta with gold trims to be tied over the white skirt. In order to team the white fabric with blue trim with the dupatta with gold trim, I bought two metres of gold ribbon and two metres of blue ribbon and  attached them to the respective trims. Now, they looked close to a white silk saree.
  • Bright coloured blouse for the saree – we chose a dark purple blouse which was close to the blue trims of the ‘saree’.
  • Wrapping – Santoshi wore the purple top over the off-white skirt.


  • Aligning the trim at ankle level, the white dupatta was wrapped around her at chest level.


  • It was secured with a knot at the back, just tight enough so that it wouldn’t slip.


  • Next was the other white fabric to which I added the gold trim – it was pleated and secured on her left shoulder with a safety pin, with one of the fabric falling behind her shoulder for about one foot. The rest of the fabric was wrapped around her and the other end was pinned to the dupatta and the blouse near the waist.

Veena

  • I took a print of photo of a veena on vinyl material and cut  it to shape.

  • The print out was turned over, glue applied near the outline and pieces of cardboard were stuck on it to give it a firm backing. I used heavy books to press the cardboard to the vinyl material.

  • After the glue dried, I cut the excess parts of the cardboard, which I realised was a mistake. First, I should have drawn the outline on the cardboard and cut it to shape and then glued it to vinyl.  This is because cutting the cardboard with the print out on top was very difficult and I was running the risk of ruining the print out.
  • The print out was about three feet in length and I did not have a piece of cardboard than was as long. Instead, I had four smaller pieces of cardboard which made the veena bend at every joint.
  • I wanted to add a long strip of cardboard for the entire length to prevent bending but then a light bulb went ‘ding’ above my head. Last year, I had made a mop with a lightweight PVC pipe as part of the costume for cleanliness dance.
  • With packing tape, the PVC pipe was attached to the veena which gave it a rigid, firm backing, yet keeping it lightweight.
  • The hollow pipe was perfect as loop for the string which was used to hang the veena across.

Crown

I bought a gold colour crown from a local store along with a set of glitter foam sheets. The saree was white and blue. So, I used superglue to attach the blue glitter sheet with gold trims behind the band that rests on the forehead. The crown already had a clip/comb-like end on both sides to secure it in place on her forehead.

Bangles

I  couldn’t find bangles of her size in the colours that I wanted. So, I cut the glitter sheets into thin strips and taped them together around her wrists.

Necklace

An imitation gold-colour necklace that we already had. I didn’t add more in terms of necklaces or long chains because one, it may be uncomfortable for her and two, the veena will be hung on her shoulder across her body, hiding any more jewels.

Face make-up

She wore a black eyeliner with a golden dot at the end, a red bindi and a light pink lipstick.

Here she is in the full costume

  Thanks for reading my post!

1

DIY Wonder Woman costume for kids

Hi! Another costume for the summer camp.

Santoshi announced that she needs to be dressed up as a superhero for summer camp on Friday.  Thankfully, she gave me the information on the Wednesday before which was enough time to think of a costume and try to come up with an acceptable idea.

I interviewed my husband (he loves books, comics, superheroes,…) on female superheroes and we came up with quite a long list (supergirl, catwoman, gamora, black widow, scarlet witch, wonder woman, etc.) but we finalized wonder woman because there was no male counterpart and she was a very strong character.

Skirt

When I asked Santoshi if she liked to dress up as Wonder Woman, she agreed.  She also said, “that means you would let me go to the summer camp in my underwear like wonder woman?” Whoa, that actually threw me off balance, so I turned to my hubby for help and he showed the latest Wonder Woman costume. A quick check of Santoshi’s wardrobe and my bag of scrap fabric pieces revealed that there was no blue leggings or trousers or jeans. So I had to go with a different kind of costume – one that involves a skirt.  Santoshi has two short blue skirts – one was light blue Barbie skirt and the other was pleated skirt in dark blue with white spots.  The dark blue seemed to match the skirt of the first wonder woman in this picture.

wp-1463119823005.jpg

I wanted to add stars to the skirt. Given my superior sewing skills and the shape of the star and my not-in-an-adventurous mood, I thought of pasting stars cut out of paper. But instead of paper, I used a subway take-away bag for the stars and used fabric glue to stick the stars to the skirt.

wp-1463119830369.jpg

wp-1463119836830.jpg

When Santoshi asked why she had to wear a skirt when the picture of Wonder Woman she had coloured at the summer camp did not have a skirt, I had to think of something quick – that she forgot to wear the skirt before someone took a picture of her. That got Santoshi thinking (for the next n questions on the statement I made, so I tried to divert her attention to something else).

Top

Now for the top. I got shiny red and bright yellow fabrics from my stash and also a lengthy ribbon.

wp-1463119675251.jpg

After googling the Wonder Woman logo, I cut it out of the yellow fabric, stitched it to the top of the red fabric using buttonhole stitch and trimmed the strands that frayed out.

wp-1463119803868.jpg

The ribbon was cut into four equal pieces. I attached two of them to the top ends of the red fabric and the other two to the middle so that this piece of fabric could be wrapped around Santoshi’s torso over her t-shirt and the bottom end could be tucked inside the skirt.

wp-1463119844630.jpg

Headband

I thought this would be easy but turned out not to be so. After pasting a star made of red paper on the band of golden paper, a piece of cardboard was pasted behind to make it firm and also hard to tear.

wp-1463119853454.jpg

Then I realized that my practice of procrastinating (of cleaning up waste paper, stationery, etc.) paid off this time. I found the paper crown ‘I survived the angriest whopper’ (adjustable to fit the head circumference) that Santoshi received during our recent visit to Burger King. I pasted the headband on to the BK crown and cut off the unwanted parts of it. I guess Santoshi was waiting for this moment “Mom, WW has no hairstyle, so I need to leave my hair loose!” Made a small plait on each side of the forehead and brought them together to the centre and put a rubberband to secure them. Then the headband was adjusted to fit her head.

Bracelets of submission

A sheet of silver paper was cut into half, wrapped around each hand and secured with sticky tape. This was the easiest part 🙂

All done – Here she is, proud of being (dressed up as) a superhero.

wp-1463119864865.jpg

PS: the red fabric started sliding down, so I had to pin them up to the t-shirt.  The yellow colour on the pink t-shirt is the top of Tweety’s head.


1

DIY mermaid costume for kids

When I enrolled Santoshi for summer camp, my expectations were quite straight forward and simple – that they would keep her for a specified period of time each day and also entertain her.  She winning some new friends would just be a side benefit.

But, whether these expectations were met or not, I ended up with assignments more than once.  The first was my daughter squealing delightfully, “Mom, I need to dress up like a mermaid tomorrow!” When she told me this around 2 pm that Wednesday, I said, “wow, great!” without any emotion, as usual.  Then a few hours later, I realized that Santoshi was thinking that a mermaid costume would be ready the next morning and that I needed to get to work.

I googled ‘diy mermaid costumes for kids’ and ended up with a lot of results with awesome costumes. Short on time and with materials that I could gather from local stores, I had to improvise a lot.

Santoshi had decided to wrap one of my stoles across her chest over her camisole. I was relieved. I had to work only on the fin portion. I bounced my ideas off her to avoid a tantrum the next morning.  She was ok with my idea (which I will explain in this post).

My idea was to cut a piece of chart paper in the shape of mermaid tail (two pieces of the same size), add fish scales using the gift wrappers and tie them around her waist – one in the front and one in the back.

Things I used:

  • One piece of chart paper
  • Two sheets of gift wrapper
  • Glue
  • Pencil
  • A pair of scissors
  • Two pieces of ribbon/ string


I folded the chart paper in half and cut them in the shape of the fish tail (measured to fit Santoshi from waist to roughly below the calf muscle). The gift wrappers were cut in many strips with a straight top and a wavy bottom.  These strips were pasted on the chart alternately in a staggered fashion to get a design (remotely) resembling scales on Disney’s Ariel. Once done, I let them dry overnight.

IMG_20160502_192728

The next morning, once Santoshi was ready wearing a t-shirt and a pair of leggings, I tied the stole across her chest, which made her giggle and grin sheepishly.  The top portion of the chart was folded back and secured using packing tape. I slid a length of thin ribbon into the loop and tied each piece individually around her waist. She was elated to be dressed like a mermaid.

IMG_20160428_080156~2

The only trouble was that she could not sit with the piece tied behind her.  After posing for a few clicks, she wanted the rear tail to be removed. As I had supposed, she came back from the camp without the tail. ‘It tore off, momma…,” I was like, “yeah, of course it did”. With the intent of maintaining peace, I didn’t talk about how it tore, etc. And anyway, there other tail was still around.

The fact that she was excited about the costume makes me want to make one out of fabric – just a tail for the front which she can tie around her waist on any frock or skirt. That’s for a different day, though.


0

DIY cloth bag

Hi!

Time for a diy item!

I got a beautiful blue silk saree as a  gift from my parents for my wedding anniversary with a piece of fabric for the blouse.  Since I got a different blouse for that, I decided to use the fabric for something else.

The eco-friendly goody bag that I received at some other wedding, the fabric and a zip were all that I used for this item.

After aligning the bottom of the fabric to that of the goody bag, the bag and the fabric were sewn together with zip on top and two handles made with the fabric.

It measures roughly about 12 inches by 12 inches – good enough to carry my phone, wallet and keys for a dinner or party.

image

The goody bag

image

The fabric

image

The finished bag

As usual, the finishing leaves a lot to be desired. But, I am still happy with it.

Thanks for visiting!

1

Prop and costume for “cleanliness” dance

Hi!

It all started with a call from my mother that Santoshi, my daughter, was selected for a dance programme at school and that she needed to carry a prop with her the next day.   Unfortunately, my mother couldn’t explain what exactly the prop was.  She said it was a duster.  I imagined it was something similar to this but she said it had stringy ends made of cotton.  I was irked because I didn’t know what I had to send the next day.  When I called the school to get some clarity from the teacher, I got to know that the teachers had left for the day and even if they were still around, parents needed to come in person.

I called my mother again and she repeated the same thing again – stringy cotton end duster.  On the way back home, I got a duster which somewhat resembled this one.  When I reached home, my daughter opened the door and greeted me.  She was amused by the duster that I had in my hand.  I told her that it was her prop for the dance programme, she said, “No, I need to carry a mopstick and this is not a mopstick”.  I called my mother and she repeated for the second time that it was a duster and not a mopstick.

I sent the prop with Santoshi the next day, which was a Tuesday.  She told me that she needed to carry a mopstick and not a duster.  Since it was becoming frustrating, I decided to meet the teacher on Wednesday morning.

Santoshi was quite upset that she had no prop to take with her and that the teacher had asked her on Tuesday why she hadn’t brought a mopstick.  I convinced her that I would be meeting the teacher to find out what needed to be sent and that she could carry it the next day.  She must have been wondering, “Why? I already told you, it is a mopstick”.

After dropping her at the gate, I filled out a request form to meet the teacher and waited at the lounge.  A few minutes later, a member of staff told me that Santoshi’s teacher was on leave.  I explained to her that I wanted to know the prop for the dance programme. So, she asked me to follow her.  She introduced me to Ms. D, who was in charge of the dance programme.

When I told Ms. D that I was Santoshi’s mother and I was not sure of the prop to be sent.  She thought for a while and said, “Santoshi is in the first row; so, send a mopstick”.  I asked her what kind of mopstick she was expecting.  She took me to another room and showed me “the mopstick”.  I wanted to know where I could get one such thing.  She told me, “No, you need to make it at home”.  “How exactly should it be made?” She looked at me as if I should have known the answer.  “Buy a PVC pipe as tall as your daughter, wrap it with bright coloured paper, cut a mopcloth into strips and attach them to one end.”  It was then I told her that since I did not know what to send, Santoshi hadn’t brought any prop.  I assured her that she will carry a mopstick, as instructed, the next day.  She gave me the evil eye and I decided that it was time to take my leave of her.  I was at the door when she told me, “I am sure you know about the costume, too”.

Costume? Oh, I should have known.  I asked her to explain the costume to me.  “Send her in dungarees”.  “Dungarees?”  “Yes, dungarees.”  “Sorry ma’am, what exactly do you mean by ‘Dungarees’?”  “You know, the overall types with ankle-length trousers…” “I understand ma’am, I will get it.” “Also, a blue t-shirt.” “Light or dark? Full-sleeve or half-sleeve?”  “Light blue t-shirt, because the dungarees are dark blue.” (another piece of information that dungarees had to be in dark blue colour.)  “Anything else, ma’am?” ‘Navy blue socks.”  “What about the shoes?” “No shoes.”  My next question was about the hairstyle, then better sense prevailed over me and skipped that question.  I thanked her from the bottom of my heart and was about to leave.  That’s when she said, “bring the costume before Friday for approval”.

I was thinking about where could I ever find dungarees for a 4-year-old girl (who is actually tall enough to wear the clothes of a 6-year-old girl).  I printed out a picture of dungarees and made a list of shops which might carry them.  In the lunch hour, I went out to the shopping district of our city.  Most of the shops looked at me as if I was an alien looking for dungarees for 6-year-old.  One of them openly said, “Don’t you know that the biggest size in this pattern can fit at best a 2-year-old?”

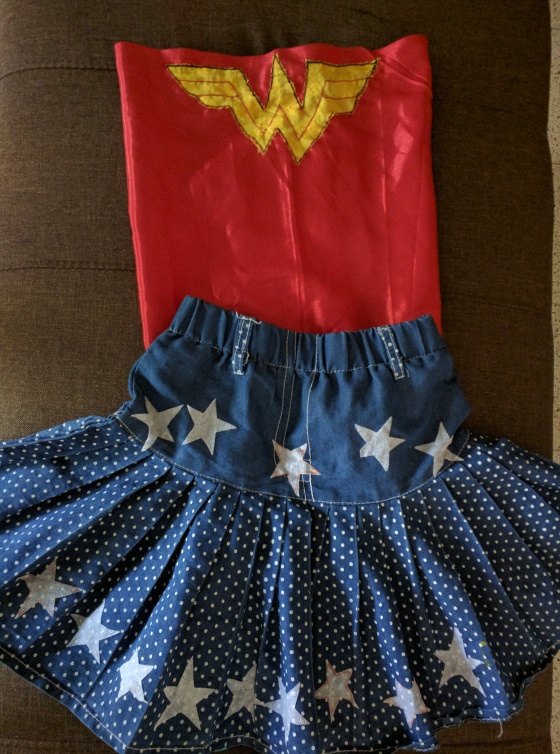
So, no dungarees.  It was a Wednesday and I was already two days behind the other parents who had got the information on Monday that week.  Could I get denim fabric by the yard and get a tailor to stitch it?  No one would make it in a day and it was close to the biggest festive season in India and no tailor would even agree to make it.  Can I make it myself? I only wished I had learnt sewing.  Oh, wait, I can’t make one from scratch; but, I could put a pinafore and a pair of jeans together and create one!  Luckily, Santoshi had a dungaree dress already.  I only had to buy a pair of jeans of the same shade of blue.  But, the entire thing depended on the teacher approving the costume.

dungaree dress

I bought a pair of jeans and a light blue half-sleeved t-shirt and went back to work.  Once I was home, I dug the dungaree dress out of the bag which had clothes to be given for charity.  I packed the jeans, the t-shirt and the dungaree dress in a bag to be shown to the teacher for her “approval” of the DIY dungarees.

Then, to involve Santoshi, I took her with me to buy the items for the DIY mopstick pop.  It was raining, so we took an umbrella.  Santoshi started singing, “It’s raining, it’s boring (pouring),the old man is snoring; he jumped on his bed, bumped his head and couldn’t wake up in the morning!” She told me excitedly that she had learnt the new song that day.

We went to the store that sells pipes, taps, etc.  When I told the shopkeeper that I wanted a PVC pipe of about 40 inches in length, he immediately asked me, “1/4 inch, 1/2 inch or 3/4 inch diameter?”  Wow, I didn’t know.  So, he got PVC pipes of all diameters out.  Everything was quite heavy and would not be the right material to make the prop.  I asked him if there were any PVC pipe that would be light.  I explained to him that the purpose was to only serve as a prop for a school programme.  He told me to go to another shop which would have light-weight PVC pipes.  I thanked him and went to the other shop.  They did have such pipes!  I got a pipe which was 40 inches in length.  Next stop was at our grocery store where we bought two pieces of mopcloth.

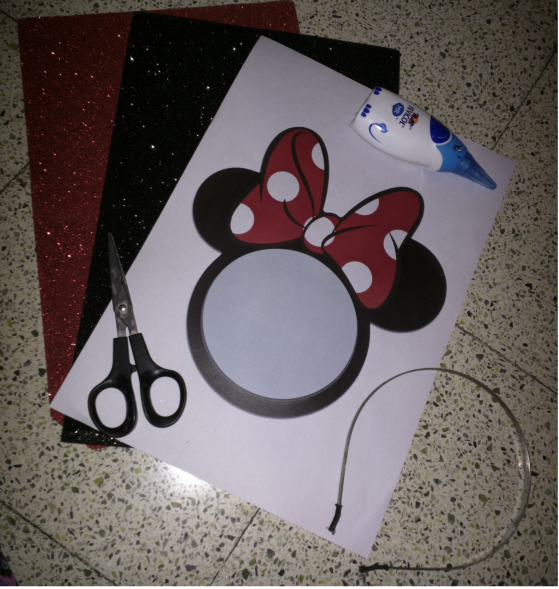
After coming home, I wrapped the colour paper on the PVC pipe; I then  cut both the pieces of mopcloth into long strips, pasted them to one end of the PVC pipe with a string.  Then, I realized that while I was pasting the strips, the fabric glue ruined the surface of the colour paper.  So, after the fabric glue had dried, I wrapped more colour paper around the pipe and added a label “Santoshi” on the top end.  Santoshi wanted to know why I put her name on the mopstick.  I told her that the label was to identify this mopstick as hers and no other child will take it.  After all, I didn’t want Santoshi to come crying the next day, “…that boy said it was mine and took my mopstick away.  Can you make another one for me?”

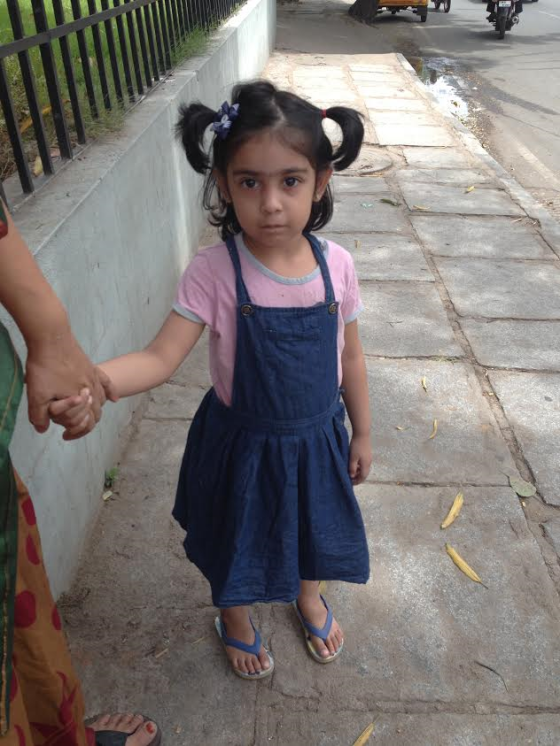
It was Thursday morning. With my laptop bag on my back, purse on one shoulder, mopstick on the left hand, I took Santoshi’s hand in my right hand and started walking from the parking area to the school gate.  Santoshi asked me if I could carry library folder too; ugh, ok.  I thrust the folder into my purse and walked along.  While most passers-by (not connected to the school as teachers or parents) looked at me weirdly, one of the parents of Santoshi’s class rushed to me, “Are we supposed to send anything today?  Have I forgotten?”  I assured her that everything was ok and that it was Santoshi’s prop for dance programme.  She was relieved.  So would I be if the teacher approves my idea, I thought.

As I dropped Santoshi at the gate, a member of the staff said, “Why such a big mopstick?  We had said it had to be her shoulder height of the child.”  Facepalm! I forced myself to smile and told them, “I can saw it to her shoulder height, ma’am”.  She said she would let the teacher decide.  I filled a form out and met the teacher.  Thankfully, Santoshi’s teacher was available that day and I told her that I couldn’t find dungarees for her but I could come up with one if she would allow and explained my idea to her. She looked at everything and said ok.  Yay!!  I thanked her profusely and asked her why these instructions (prop, costume, deadlines, date and venue of the programme, etc.) couldn’t be put in the school diary in the ‘Notes from Teachers to Parents’ section, which would have ensured that there was no ambiguity or anxiety about the entire thing.  She had no response but at least assured me that they would do it the next time.

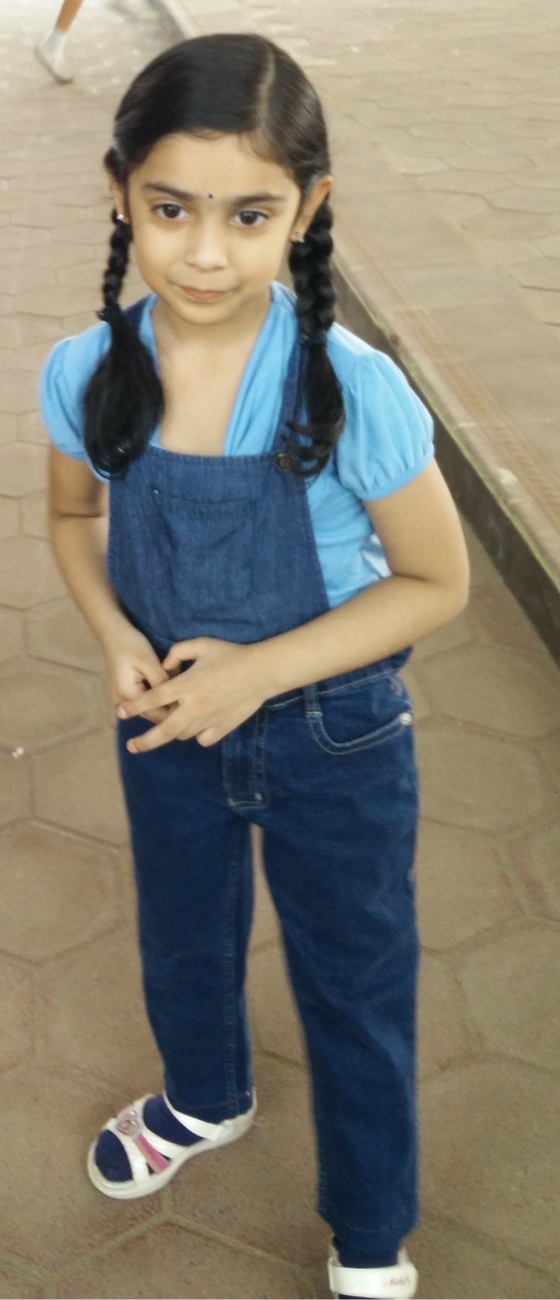
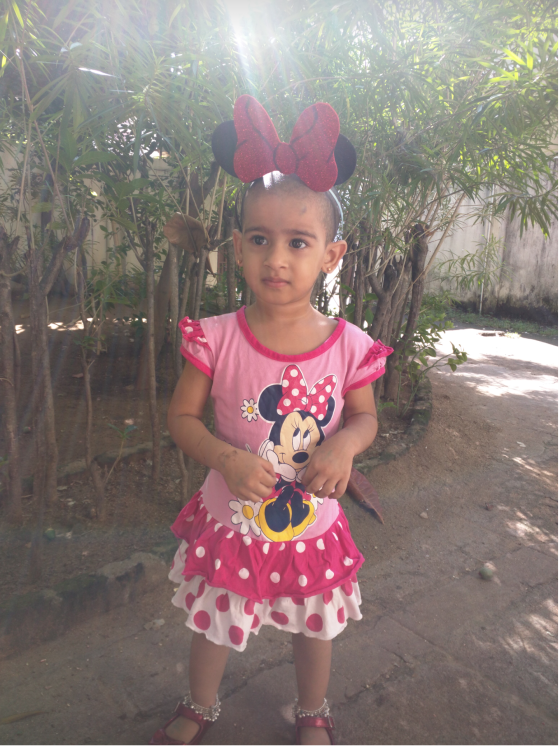
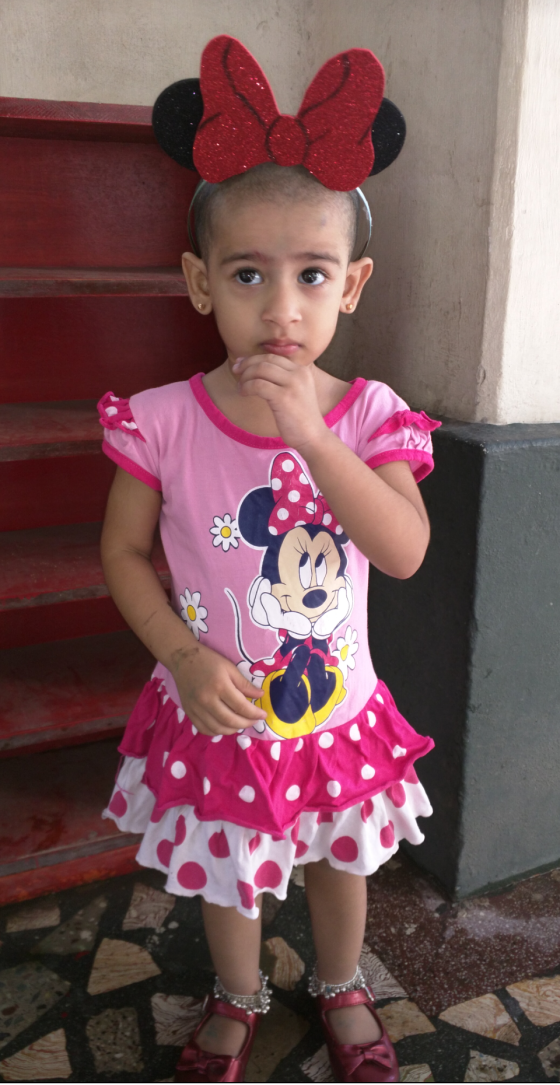
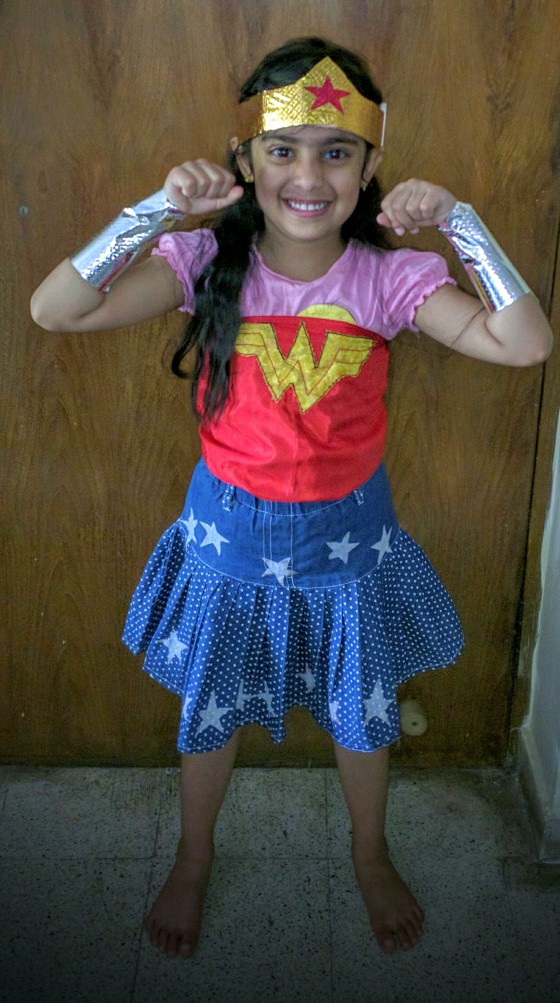
Back home that evening, I snipped the top of the dungaree dress and attached it to the waist of the jeans and voila!

dungarees

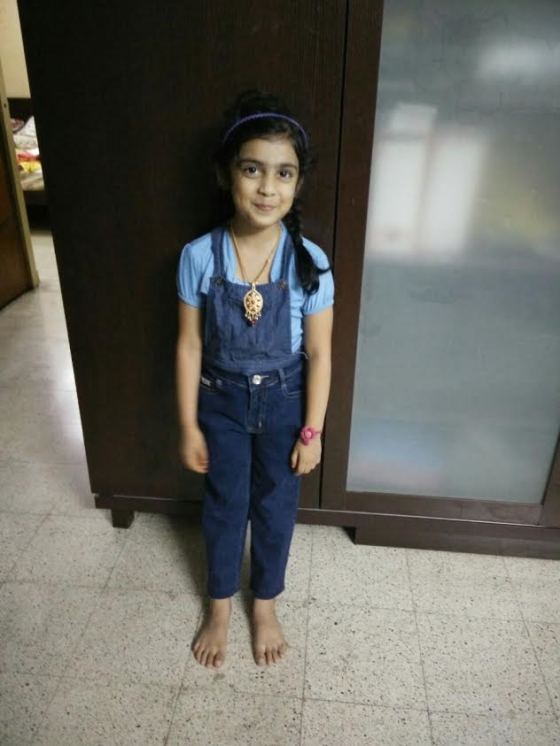
Though she is smiling in the photo, she was not very happy wearing it.  I told her that this was what her teacher wanted for the dance programme and she reluctantly agreed.

The next day, I took the “finished piece” to Ms. D and she too approved it.  Whew, what a relief!

On the day of the programme, we were supposed to get the children dressed in their costume and bring them to school about 30 minutes ahead of the start time.  Which meant that she didn’t have to go to school at the usual time.  When it was close to the time we were supposed to leave for school on normal days, Santoshi grew suspicious.  “Why are we not leaving for school? And, why are you not dressed for work?” I explained to her that we were going directly to the stage (the auditorium, that is) a little before the time when the programme would start and that I would go to office after her school gets over for the day.  She was not very sure of the first part of the answer but was happy about the second part.  Then, more questions on if I would be around for the programme, if I would pick her up after school,… which I tried to answer before my patience ran out.

We reached the school about 30 minutes prior to start time.  She was very happy to see her classmates (who were also part of the programme) in the auditorium while the others were still in the classroom.

IMG_20151105_094819

The programme was enjoyed by all of us. Santoshi’s dance was the concluding part and chaos reigned with sixteen children aged between 3 and 4 running all across the stage.  After the programme, we were allowed to take a few pics.  Santoshi was busy looking at the mop holding it upside down and spinning it around.

IMG_20151105_110418[1]

The school ensured that we had more ‘fun’ after the programme, too.  Parents were asked to pick their wards up from the stage, get them back to wear uniform and drop them at the classroom.  I picked Santoshi up and asked one of the teachers, “Ma’am, where can we change her clothes?”  She said, “Well, we hadn’t thought about it.  Now that you are asking, why don’t you choose a corner where no one is around?”  I don’t think they realized that children didn’t want to change clothes in the open.  Then, I took permission from a member of staff and used the first-aid room to change her back to uniform.

As I dropped her near the staircase leading to her classroom, she seemed upset.  She waved bye to me and proceeded to her classroom.  There was still about an hour to pick her up. I couldn’t help but think of the previous year when she was selected for the anniversary programme in August that year.  When the teacher proudly told me mother about this, my mother swiftly requested to take her out of the programme.  The teacher was quite surprised.  My mother pointed out to the teacher that it would be too much of work for me to run around for costumes, accompany her for rehearsals, arrange for pick up and drop at school, etc. since I was pregnant at that time, due by end of September.  I was very grateful to my mother, though more than year had passed from then.

I picked her up at the usual time and proceeded to office.  I made my mind up that if she gets selected for any other programme, I would have to make it a point to meet the teacher at the earliest opportunity.  There might come a time when both my kids are chosen for one programme or the other at the same time.  It makes me rejoice that it’s not for another two years from now.

Bye!

0

Elsa Costume for Halloween

Hi again!

Another costume to be made and as usual it started with a message from daughter’s  school with only two days to get the costume ready.  The message was that either we could send them in a costume for Halloween party or in a black frock.

Though Santoshi (my daughter) has a pretty black frock, I preferred to send her in a costume.  Her most recent love was My Little Pony (Friendship is Magic).  I was trying to figure out if she had any clothes that could be turned into an MLP character costume.  A yellow frock could be made into a Fluttershy costume, but the mane and the tail wanted me to think of alternatives.  The same frock could be used for Dorami with a pair of ears, a collar, a tiny tail and a pocket.  But I knew she would always choose MLP.

Rainbow Dash, being the most popular MLP character, I was thinking of any light blue frock that she had that could possibly be turned into a costume with rainbow coloured mane and tail (which was going to take a lot of time and effort to make).

I remembered that I had a blue salwar kameez with a lot of sequins that could possibly be resized to fit Santoshi.  Instead of making a mane and a tail, I realised that the kameez could actually be made into a gown and the dupatta could serve as a cape in Queen Elsa costume.  Frozen was her favourite movie (she has watched it at least 20 times) and she could be thrilled to be dressed as Queen Elsa.

I took Santoshi’s frock and placed it on the kameez, aligning them at the neckline.  I cut the kameez to the size of the frock at armholes and the sides.  I had to shorten the sleeves and the length to fit Santoshi.  The dupatta had a beautiful design similar to a seven-petalled flower in the centre and arches at both edges made of sequins.  So I pleated the dupatta in order to have the flower at the centre and arches at the edge and sew the dupatta at the neckline of the back of the kameez.

On the day of the Halloween party, after I plaited her hair, she put on a Hello Kitty tiara and posed for me with a jack-o-lantern bucket for the treats – here she is!

IMG_20151030_075506

IMG_20151030_075526

IMG_20151030_075545

1

DIY Baker Costume and Prop for pre-schooler

I got a circular from my daughter Santoshi’s school that the theme of the month (March 2015) was community helpers and the kids were to dress up as a community helper for show and tell.  Santoshi liked the idea of baking (cakes, cupcake, pizza, etc.) so it was decided that Santoshi will do the show and tell as a baker.

I wanted to use something in my stash to make an apron and a baker’s hat.  I had got a scarf from my office on the occasion of International Women’s Day.  I do not use a scarf and it was nowhere near pretty to be gifted to anyone; so, I had just dumped it in somewhere in the cupboard.  I took the scarf and my sewing machine out, determined to make an apron (even if it holds up just until end of show and tell, it would have done its job!) with the limited experience that I had gained in making an apron for myself out of my husband’s used pair of jeans.

I cut two strips for the waist band and another strip, a little shorter, for the neck strap. I made a trapezoid for the top half of the apron and a rectangle for the bottom half.  Stitched all of them together and wow, the neck strap was longer than it should have been.  I snipped it in between and brought it to the right length, yay!! There was still a good amount of fabric left in the scarf.

I googled DIY instructions for a baker’s hat.  I found this one extremely useful: http://www.greatfun4kidsblog.com/2012/07/make-easy-kids-chef-hat-apron-glue-gun.html.  The leftover fabric from the scarf didn’t seem enough for the hat, sigh!  One quick look at the bag full of junk fabric give me a light purple fabric.  I was excited because purple was Santoshi’s favourite colour!!  I learnt that something firm or stiff was needed for the bottom part of the hat.  Remember the skirt using an old pair of jeans and a shirt? The collar part of the shirt seemed to be perfect as the stiff lining.

I measured Santoshi’s head circumference and cut the scarf (approximately 6 inches in height) to this measurement plus 2 inches for seams (being an experimental amateur, I leave a lot of fabric in seams).  For the top portion of the hat, I needed to make a circle and brought out the lid of the biggest pan that I had, lol!  I traced the circle out on the light purple fabric and made another circle (with a radius of roughly 2 inches more than the first circle) and cut the piece out.  With a little pleating, the top and the bottom parts of the hat were sewn together.  The fabric used for the top portion was a lightweight one, so it stayed fluffed up very well.

Next was the prop.  Her kitchen / grocery play set already had a few slices of pizza, doughnuts, a slice of bread and croissant.  I printed images of cupcakes, pastry slices and cookies.  The lid of an empty shoebox and a piece of cardboard served as the base for holding these items.  I was sure the children would be tempted to pull the pizza/bread slices, doughnuts, etc. out of the shoebox lid; a transparent folder was used to seal the shoebox lid.

The last step was to teach her a bit about baking – flour, oven, bakery, etc.  She was not very happy to wear the apron or the hat.  But, somehow we managed the show and tell; both the items are still in the cupboard.  You never know when it might be needed again!

IMG_20150312_072200

IMG_20150327_083525