0

DIY waterfall and pond

Hello again!

It is Navarathri / golu time of the year. This festival gets me support excited every year. Here are a few pics from my last year’s golu

Thanks to the lockdown, we had decided to have a simple display this year. It doesn’t make sense to get someone to unload 7 boxes of dolls plus the steps, arrange them, pack them up at the end of the 10-day display, load the boxes up the loft and dismantle the steps – oh, it is a task for full 8 hours!

My best friend at work had gifted me a set of three pieces – a house and a pair of elephants – all made of coconut Fibre with cardboard backing. We do have a kitchen high table which will be our golu display unit with the house and the elephants being part of a forest hermitage. I did have some grass floor pieces and a few forest animals which would go with these. Artificial flowers bought at Michael’s 8 years back were also displayed this year. But then something eat lacking. A waterfall will breathe more life to the setting, don’t you think?

After looking at many YouTube videos, I took stock of my stationery stash. No hot glue (never bought, so….) anyway so I had to make do with what was there.

Things needed

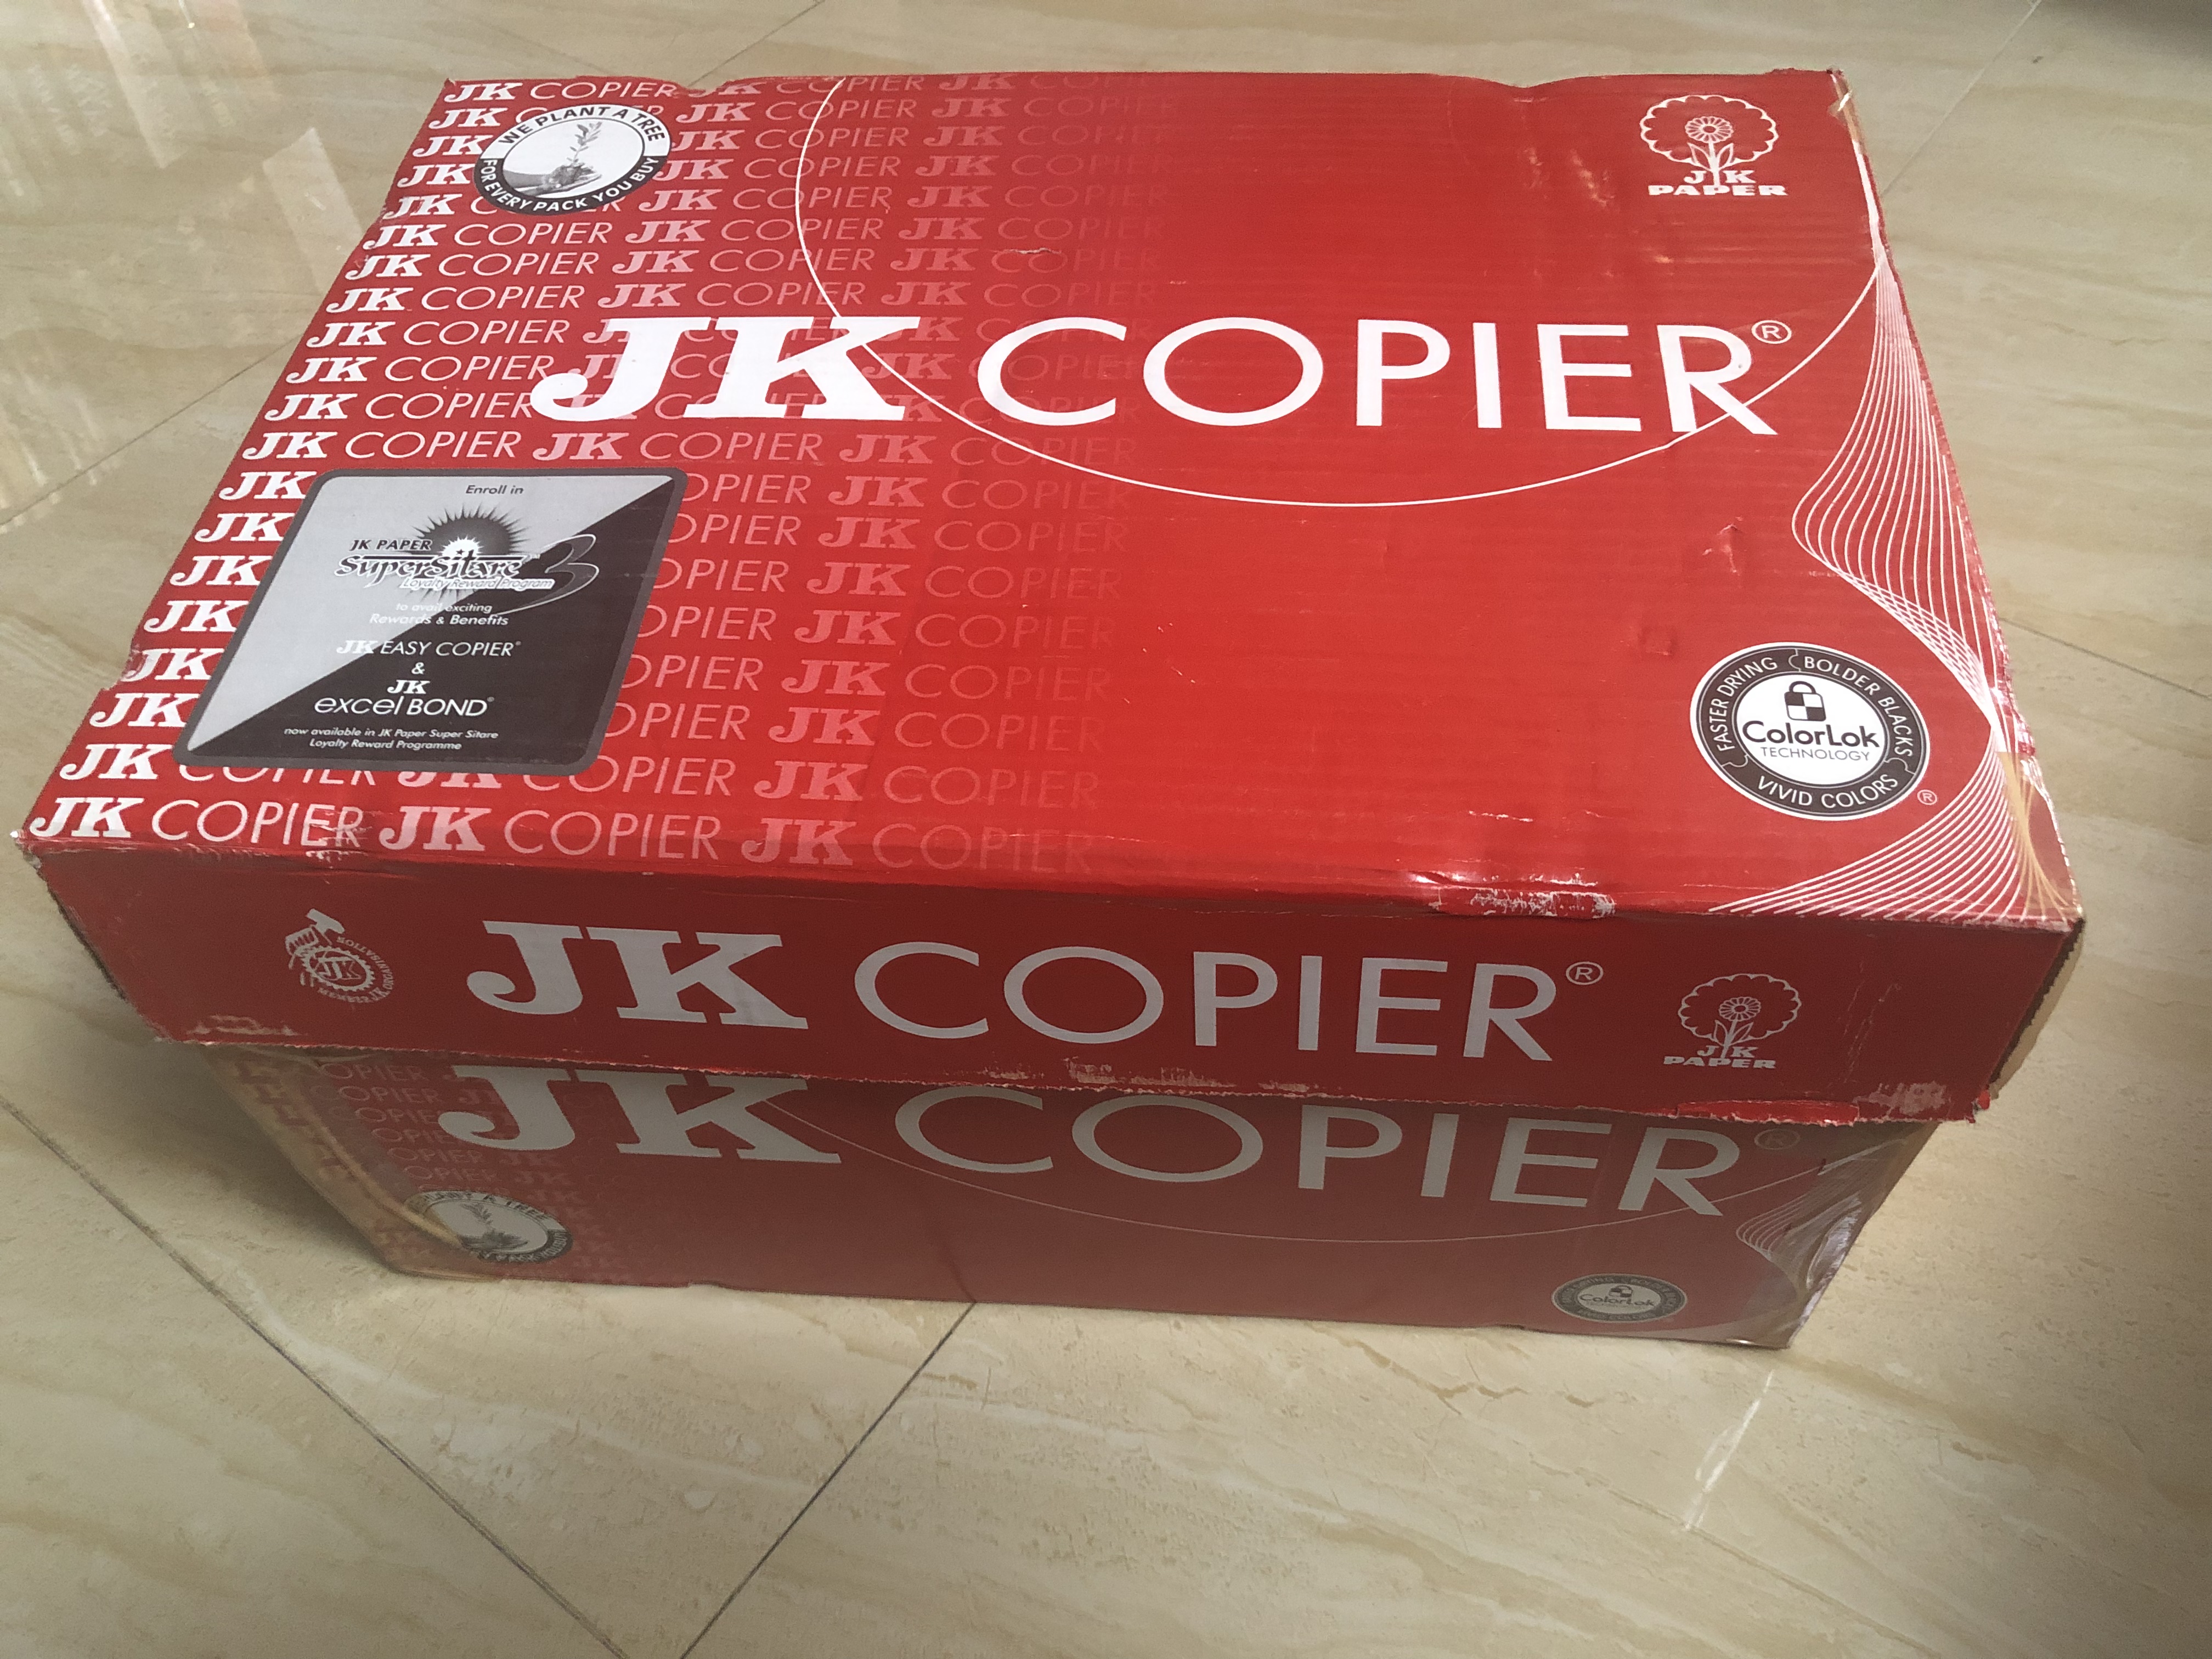
1. Cardboard – used two pieces – roughly 6 inches by 9 inches for the rocks and 8 ochre by 15 inches for the pond.

2. Blue colour paper

3. Old newspaper

4. Aluminum foil (if you don’t have this, replace it with old newspaper)

5. Acrylic paint – brown (or black mixed with red), silver, green and brush

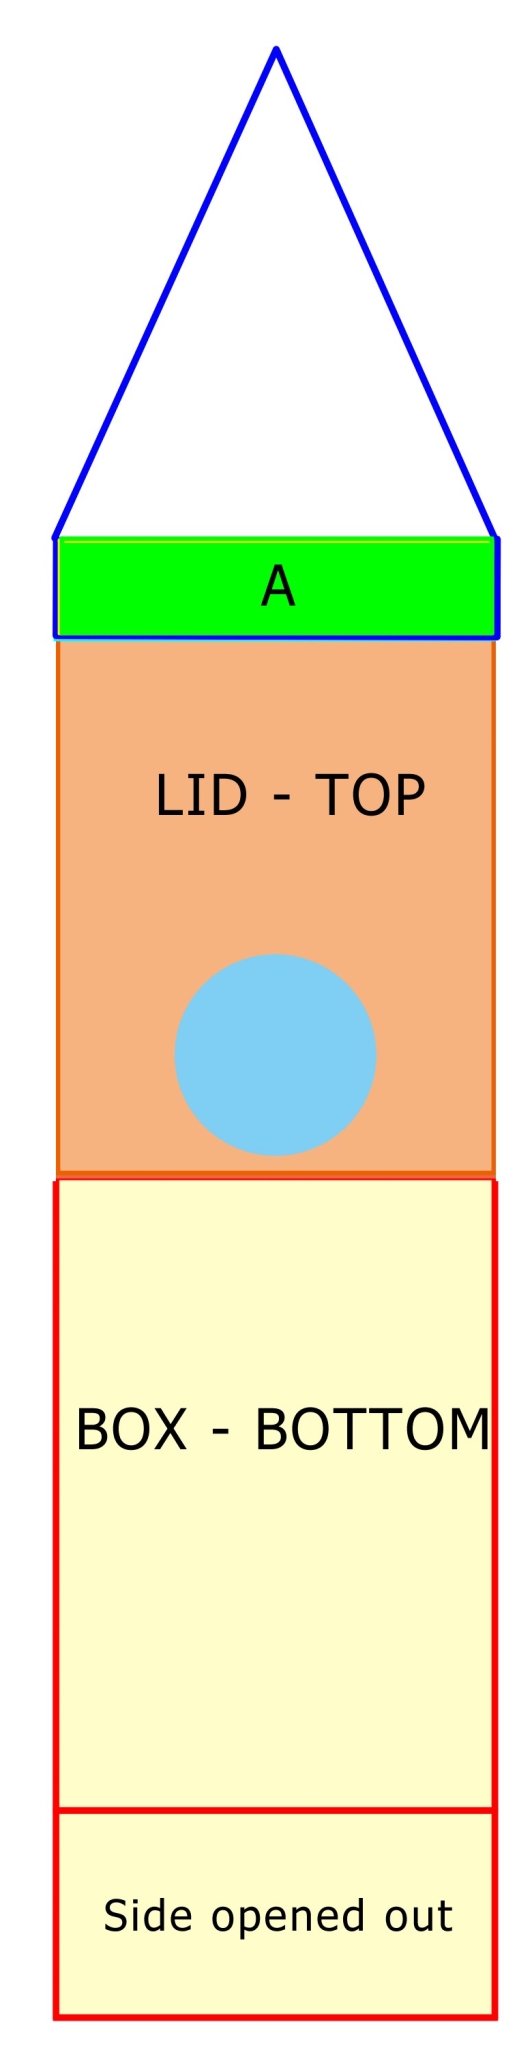
6. Transparent book cover – double the dimensions for the pond and a small strip (2 inches by 6 inches) for the waterfall

7. Pebbles

8. Plastic fish

9. Glue, tape, scissors

How to :

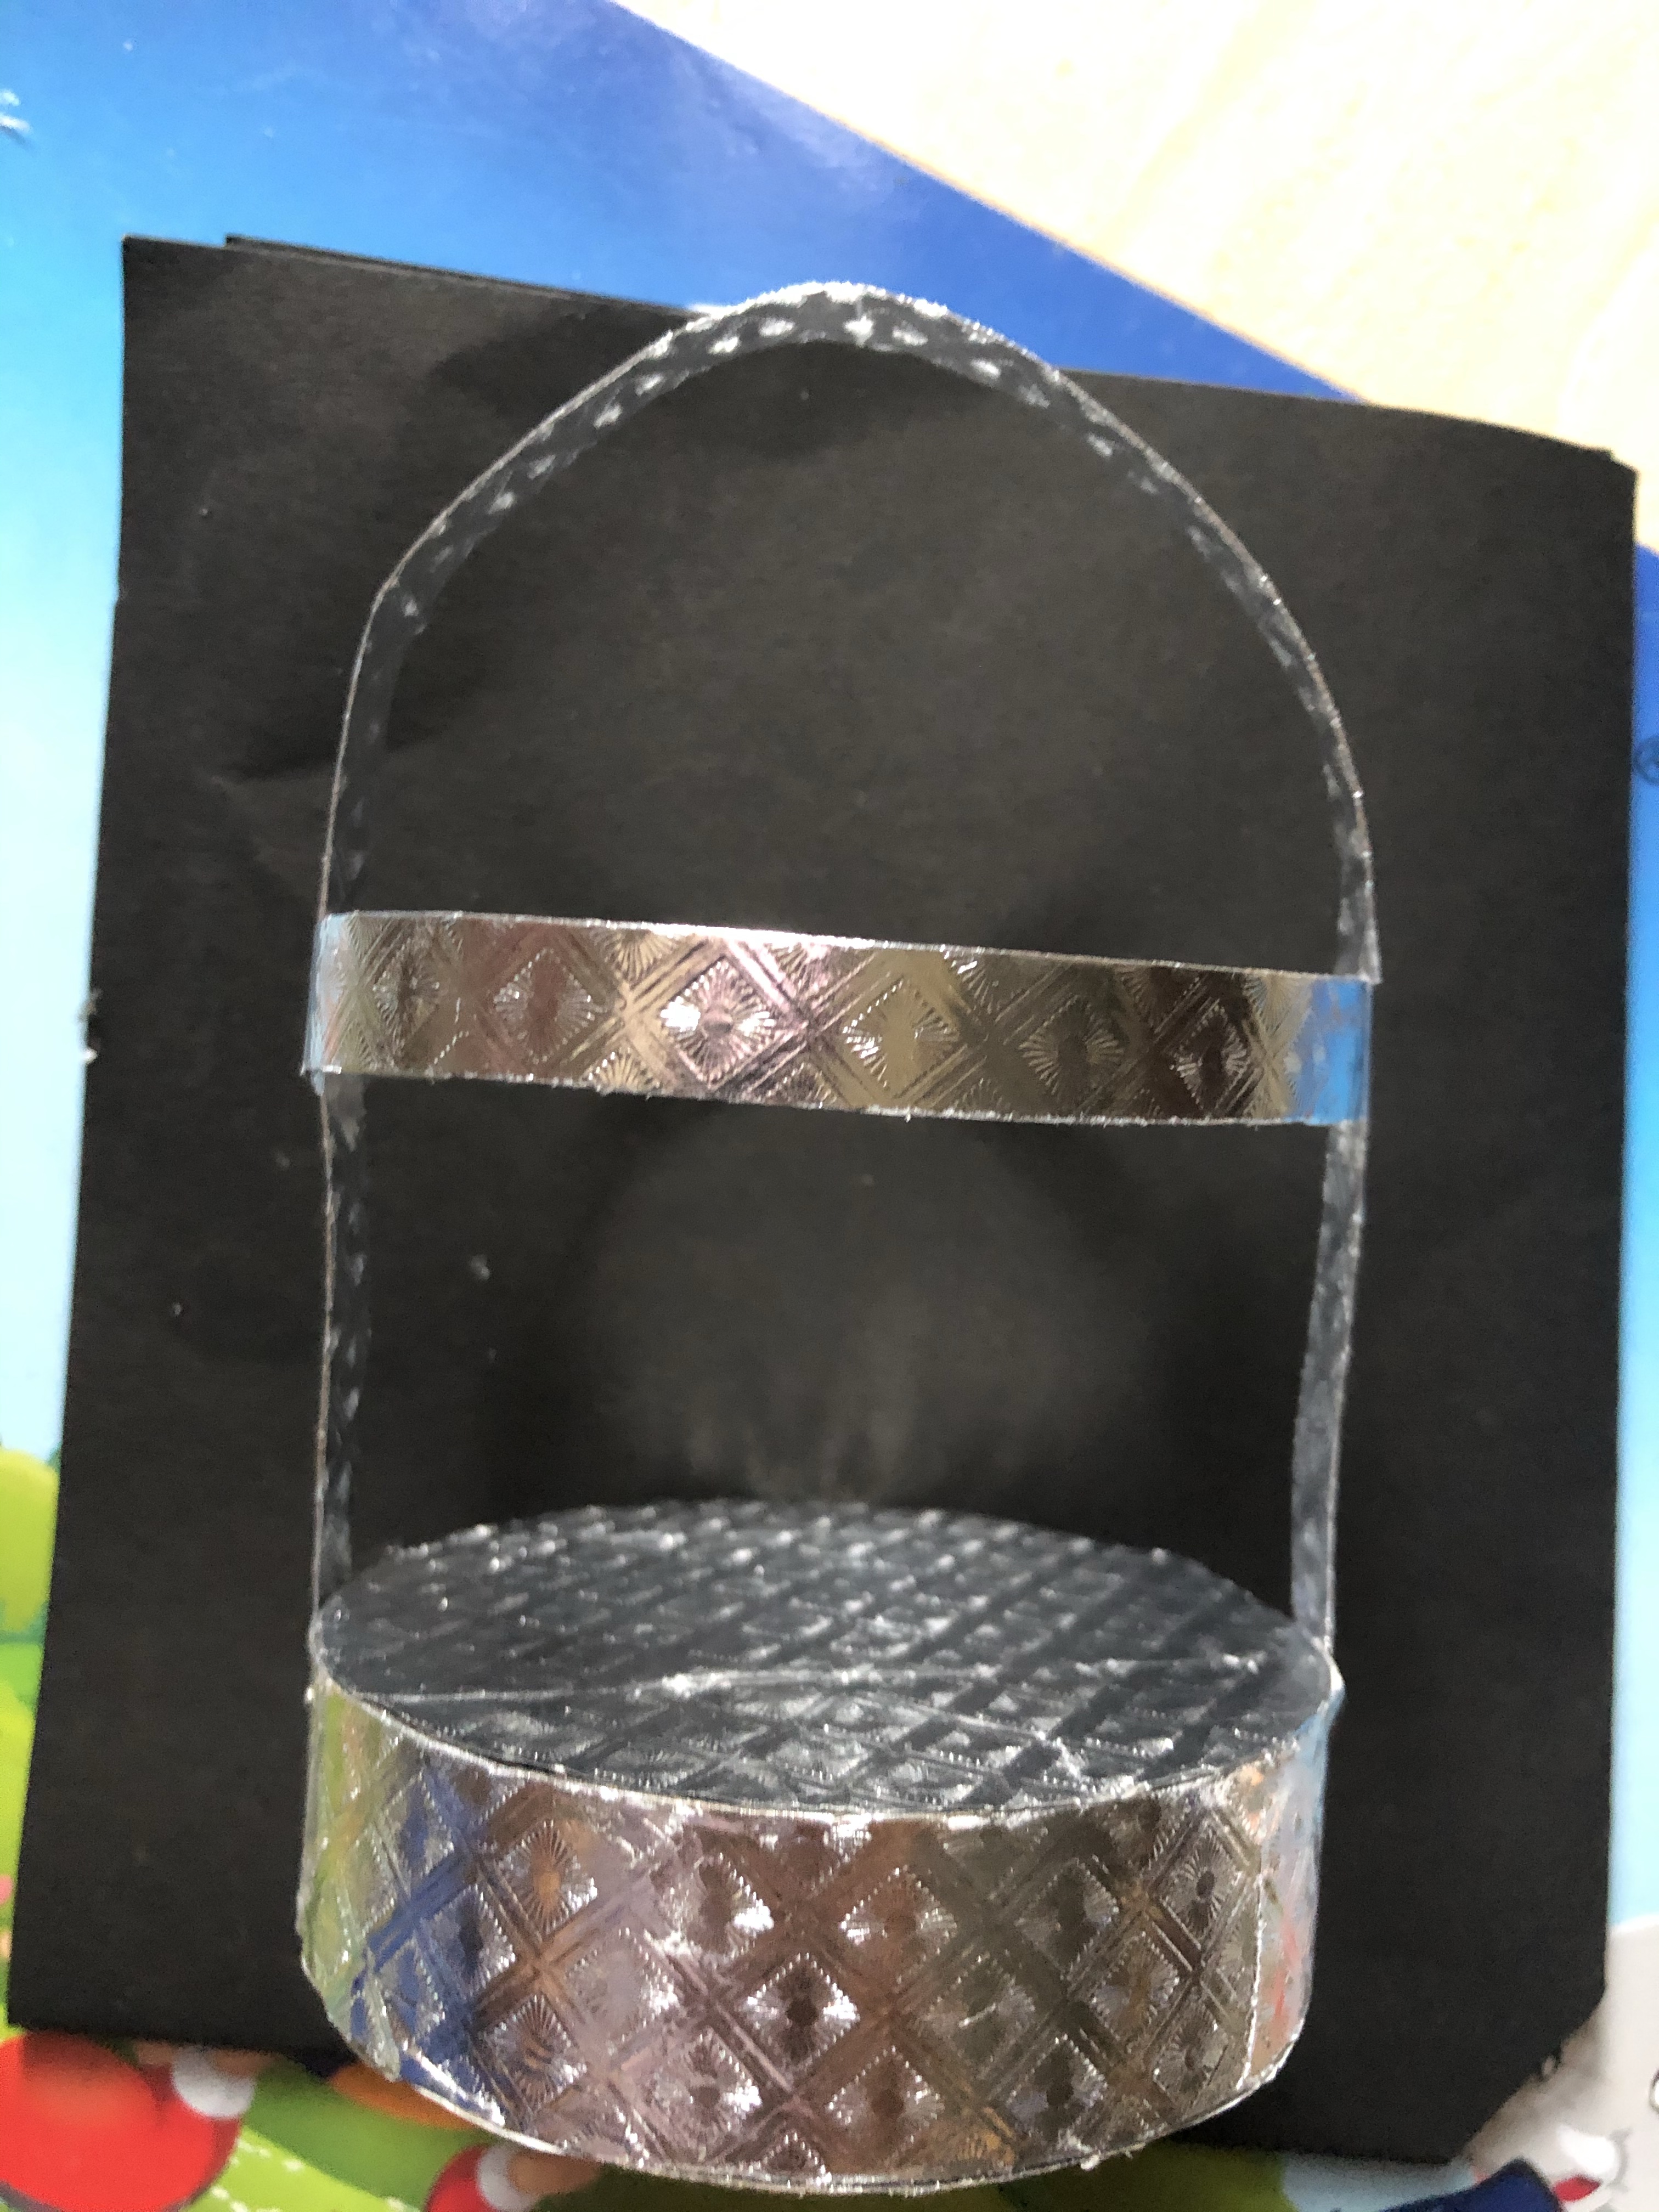
Crumple the newspapers into balls of different sizes. I used 6 for mine.

Arrange them on the cardboard (smaller size) and secure with tape.

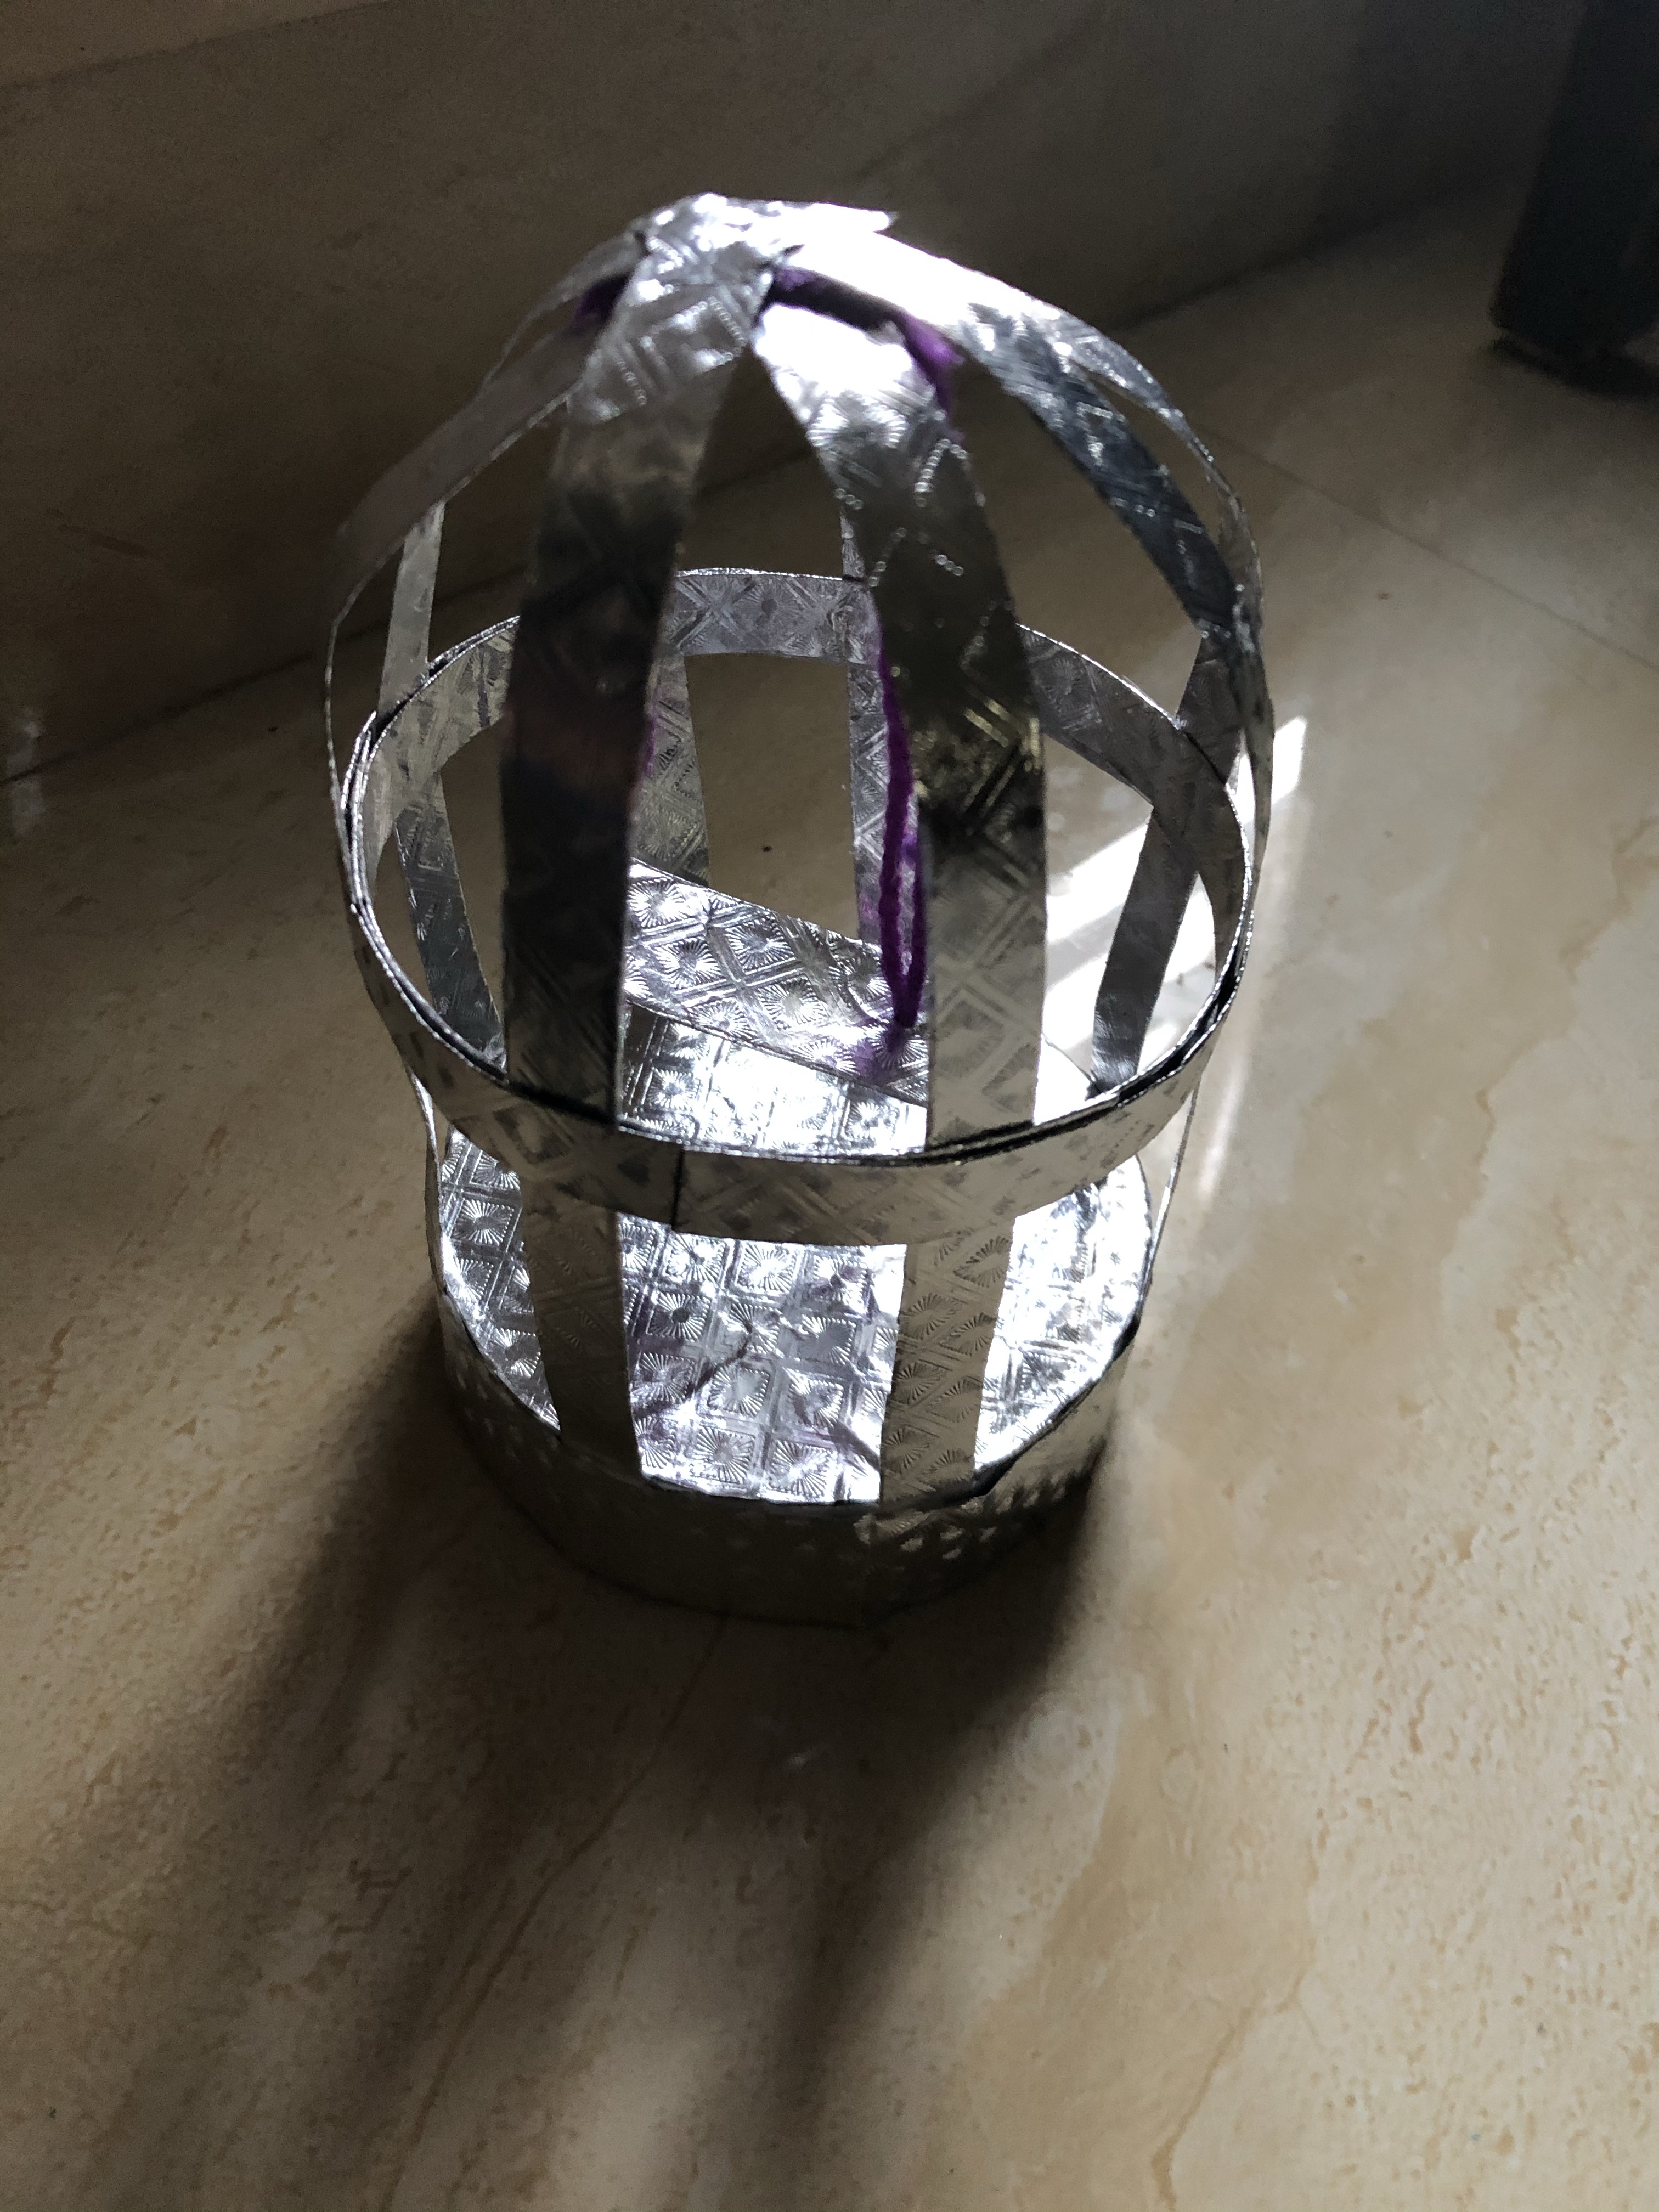
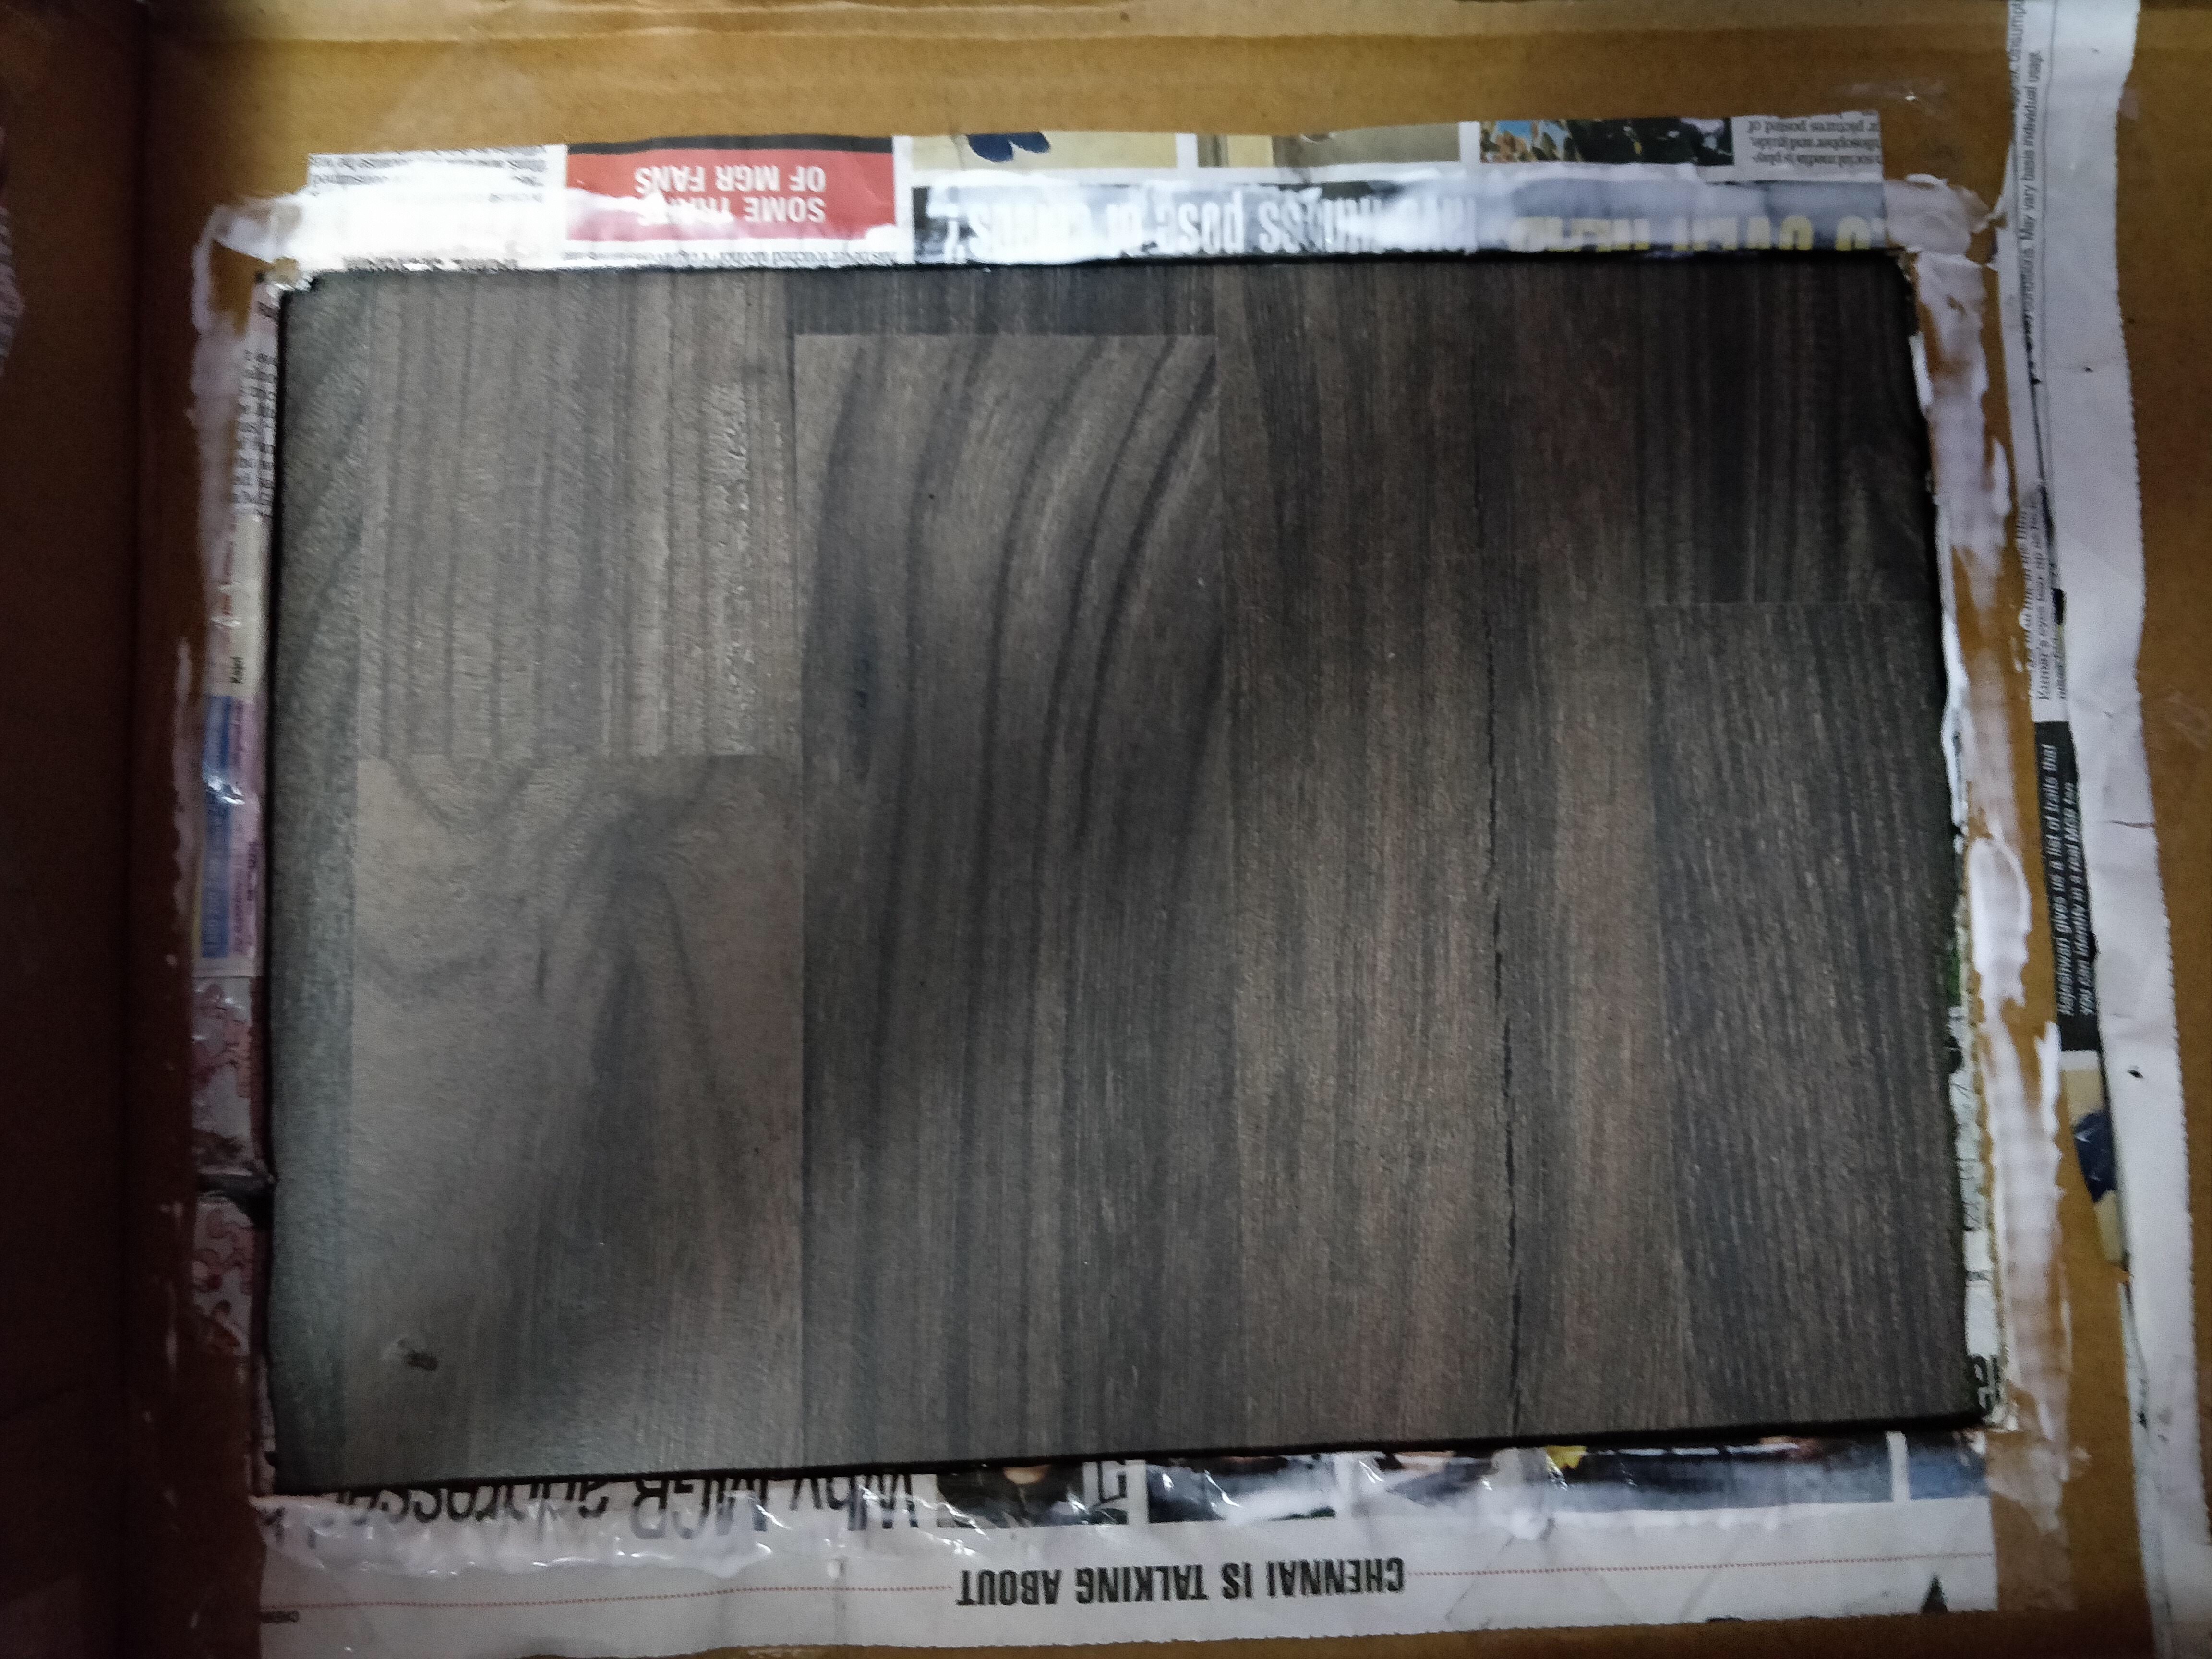
Cover the entire structure with aluminum foil – make sure to press it into the shape of the rocks and secure with tape on the back.

Mix glue with brown paint (or red and black like what I had done) and paint all over the foil.

Let dry. In the meanwhile, take the strip of transparent book cover and add glue to it – top to bottom – don’t make them straight lines; break them up in between if needed and let dry. I used normal glue since I do not have hot glue – it worked pretty good for me.

While both these dry, let’s make the pond. Add the blue paper to the cardboard base. Cover it with transparent book cover (secure with tape at the back). Stick the plastic fishes using glue and cover it with second sheet of transparent book cover.

Add pebbles to the perimeter. I had bought these pebbles from a pet shop which sells aquarium decor and had used it in 2017 golu.

Once the rocks are dry, add a bit of green paint here and there – like moss or small plants.

Once the waterfall strip is dry, using the silver paint, add the froth /bubbles on the strip.

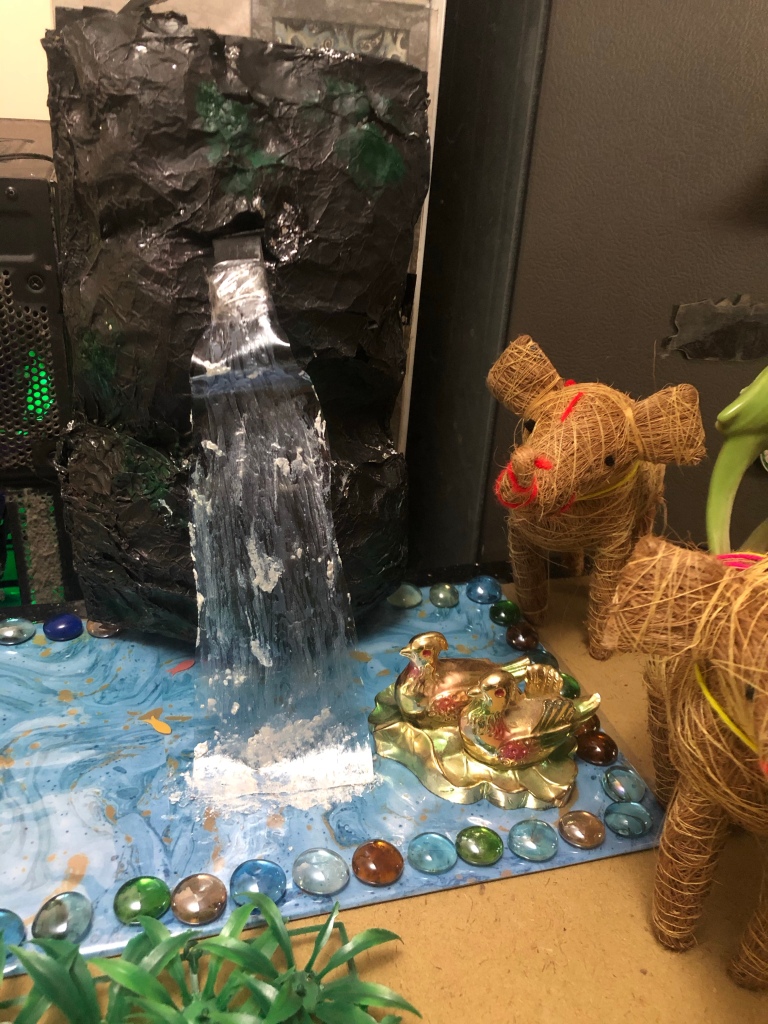
Now, it is done for assembly. Paste the top of the strip to the rocks and the bottom to the pond. Add more silver paint at the bottom of the strip and on the pond where the strip is pasted. I had added a small piece of black chart at the top of the strip in order to get the effect that the waterfall flows a bit outwards.

Add a duck or a swan on the pond and you are done!

That’s pretty much the rest of golu 2020.

So, what do you think? Does it look ok? Or ew? Comment away! Thanks for reading!!

0

DIY kimono and props for Japanese tea ceremony

Hello!

It has been such a long time, whoa!

Lockdown is fun to the extent that no need to go to office or school in person and it is better to fit the tasks during my waking hours but it also takes a toll on having to entertain kids until the next online session or get them to do things which otherwise the school would have taken care of 🙃

Anyway, about ten days back, I received a call from school about a the weekly school program in which my elder daughter was required to participate, along with 2-3 other students. The theme was Japan and the time allotted was 15 minutes altogether. Plus the usual condition – no hiring or buying costumes – DIY is allowed and also encouraged.

I was tasked with bringing up a list of items from which we could pick and choose which ones to cover in the program. I had about 1.5 days to come up with this list and I stated right in earnest.

After sharing the list with the teacher and a quick discussion, a new list was prepared and two other students were chosen. Now it was a matter of what to do or say or act about each one in the list.

The teacher seemed to be in awe about the tea ceremony and there was a lot of content – to talk / show. I requested the teacher to have tea ceremony slotted for Santoshi and promised to make a kimono for the show (I had looked up for YouTube videos on diy kimono – which was dumbed down to my sewing skills). The teacher did agree, yay!

With the lockdown due to the pandemic and one of my neighbors down with covid at a hospital (albeit asymptomatic), I was scared to step out of my home. So, it was time to improvise using whatever I already had or something that my mom had.

Having put the ideas together, come up with an order, we split the pieces among the students. Apart from the presentation of basic facts about Japan, we decided to do some Origami items and sushi rolls using paper.

Since Origami and paper craft could wait until a day or two prior to the program, I started with the usual – call my mom and give her my requirements and see what she had and what she could get (using her networking). I remembered that my father had bought this when he had visited Thailand more than a year back. I was hoping that she hadn’t given it away.

A top(?) from Thailand

I checked the width of this garment and what will it be for Santoshi’s kimono. There was so much extra that I decided to use it for the hanging part of the sleeves.

First step was to cut the excess width around the middle so that the sleeves as in this garment could be used for the kimono. The entire neck portion had to be cut. I did the cutting in 2 parts – from the back – chopped of the entire rectangle. Well, not a clean chop.

Had to stitch it up without making it look too much of eye sore

Not so bad, huh!

For the front, I marked the v neck and cut it off only at the top in order to retain the remaining part of the rectangle as overlap.

I brought my fabric scraps out to add as a trim for the v neck.

Used the pain blue for the inside flap (behind the overlap) and the copper coloured one for the trim.

Inside flap
Trim

After attaching the flap to the left side of the v neck and the trim, had cut the excess fabric to the side of upperbody.

Unfortunately, instead of cutting vertically as marked in the photo below, I cut it horizontally (facepalm).

Cursing my skills (or the lack thereof), I cut off the other side also similarly and then joined them to the base of the sleeve.

Found a pretty dark green dupatta which the kids were not using. That made an excellent obi (sash) for the kimono.

Hairdo was the next item in my to-do (to Google) list. Found this gem and tried this on Santoshi the night before. A big flop show – I didn’t have (I don’t intend to use it ever) hair spray so the hair didn’t puff up like it should. Too late to for online shopping for items similar to “bump-it” which I had seen in the USA and not so safe to go out shopping locally. Time to improvise (again). All I needed was something to give the puffed up shape. I used a simple hairband, added black acrylic yarn. I didn’t wind them around the band – that will give a bulge on both sides of the band (won’t sit flat on the head) . I wound it around me fingers and then attached it to left, right and top of the band. It looked like this :

With some beads and a thin metal wire, came up with a pretty piece to hang at one end of the chopstick (didn’t have chopsticks – used 3 wooden skewers).

Now for the tea ceremony venue : A cardboard box wrapped in brown paper became the hearth. For the tea set, I used a playoff jack o lantern bucket – painted it black (fabric color mixed it glue), added a cardboard lid and spout. Santoshi’s old food bowl became the tea bowl – painted in black. Santoshi added some gold paint to decorate it. Made 4 cups using a black chart paper. A few toothpicks and strips of paper put together became the tea whisk. Small confections were made using playdoh (sadly, didn’t click a picture of the confections).

Hello Kitty and sumo wrestler fridge magnets on the side

We placed cardboard mats instead of tatami mats and added Origami decorations in the background.

It was time for the ensemble!

Bowing

The presentation and explanation of the tea ceremony and 5S were well received 😀. I would rate this as a huge success 😊

Well, what do you think? Please post your feedback as comments. I would be thrilled to know!

Thanks for reading!

0

DIY Yarn Octopus

Hello everyone!

It’s been a loooooong time, isn’t it? Well, it’s been quite busy in the past few months – playing Stardew Valley with my husband, trying to get more illustrations done for my upcoming book, etc. But the itch to make some kind of craft was always there. It got more powerful after I saw this picture.

We have been on lockdown mode for more than 2 months now (today is the 24th of May 2020), with another week to go for the current lockdown to end. May be only to be followed by another lockdown. Anyway, there has been some relaxation for stand-alone shops recently and one of the advantages to living close to the shopping area is that hop-skip-jump and I was back home with all supplies, except for a few – not because they weren’t available but because I had forgotten to buy them.

Today’s shopping included some spools of thread, pull-skein for hand embroidery, and yarn and lightweight plastic ballsfor making octopuses – one each for my two daughters and a keyboard with numpad for my husband – all these apart from the reason for going out which was to buy a board game for the younger one because delivery of her game is delayed while the elder one has already made 3 items using the (promptly delivered) snap circuits with my husband. Well, I did buy a chess board for Anjana in this trip!

Alright, let’s get to the yarn octopus! This is the picture that I had followed. Things used:

  • Yarn (we get yarn in a different form and size than that is available at Michael’s or at Jo-Ann’s)
  • Lightweight plastic ball
  • Wiggly eyes
  • Rubberbands
  • Small piece of red coloured paper
  • Ribbon
  • Scissors
  • Glue
  • A board to wind the yarn around

I wasn’t sure how much yarn would be needed but I had anyway bought a whole pack – 6 balls of yarn in what I believe to be light salmon color for my younger daughter and an assorted mix of 7 balls for yarn for my elder one – 2 of dark violet, 1 of light violet, 2 of dark blue and 2 of sea blue, because the shop didn’t have 6 balls of purple yarn (her favourite colour). A bit of a hotchpotch, I do admit but these colours did look inviting. The alternative was neon green, which was too bright even for me!

So, remember the keyboard that I had bought for my husband? The carton was kept in a corner to be thrown out as trash. But it did seem to be having the right dimensions for the yarn to be wound around.

Yarn comes in balls likes these. A pack has 6 of them but they can also be bought individually
Started winding then around the long end of the carton

I didn’t know how many balls it would take. Ended up using all 6 for Anjana and all 7 for Santoshi.

I removed the yarn from the carton and added a rubberband to the top for the hair and it looked like this –

Now, insert the ball in this mess and secure it with a rubberband and then use a bit of yarn around the rubberband.

Now, snip the ends at the top and bottom. It gives it a less messy look.

Is it just me or does this look like a voodoo doll?

Now, divide the yarn into 8 (almost) equal portions for the 8 arms. Divide into 2, then each of them into 2 equal portions and then each of those into 2 equal portions. Now, there will be 8 portions – secure each portion with a rubberband.

Top view – do count the arms – there are 8!

Start plaiting each portion, securing each end with a rubberband and add a strip of yarn over the rubberband. Snip the ends of each plait.

We are almost done now. Add wiggly eyes, a small piece of red coloured paper for a mouth and tie a ribbon on the head as a now.

Made a second one using the yarn balls of different shades. This time, I had used a longer board (which is my portable iron board) to ensure that the arms were longer than those of the first octopus.

I had made a mistake of sticking the wiggly eyes a bit far from each other for Anjana’s octopus. So, I tried to put them closer to each other this time but still wasn’t happy. Guess the eyes needed to be bigger for that pretty look as in the inspiration!

Let’s look at costs in Indian Rupees (1 USD is approximately 70-75 Indian Rupees)

  • Yarn – 90 (Woolly) and 105 (hotchpotch)
  • Plastic ball – 10 each
  • Wiggly eyes – 10 for a back of 10 eyes
  • Glue – used hardly a few spots -10
  • Rubberbands – 5
  • Ribbon – used scrap fabrics

So, it is about 110 – 125 Indian Rupees each – less than USD 2 each!

Anjana looked at hers and didn’t share any comment. She looked at Santoshi’s and exclaimed, “Ew! That looks horrible! So many colours!”

She looked at hers again and had to ask, “Why does mine have only one colour?” She gave the name “Woolly” to her Octopus. Couldn’t say if Santoshi liked hers either. Not sure if she had named it. But I had a lot of fun in making them!

What do you think about these? Do you agree with Anjana that they are gross-looking? Comment away! Thanks for reading!!

Make a volcano using clay

Hello!

This is quite a short post because the making of a volcano didn’t take much time.

Santoshi had learnt about different landforms at school again this year but the additional assignment was to make a model of any landform using modeling clay.

During our usual after-school phone call, she said she wanted to make a snow-capped mountain and had asked me to buy clay. Not just any clay but soft clay which is easier to mold and not the one used for making a clay Ganesha which was hard to mold.

Soft clay means mostly playdoh or fun-doh. I could find some Faber castell modeling clay but there was no brown colour. Nevertheless, I bought the Faber castell clay set along with hard clay in brown, white and orange (don’t ask why I had bought orange for making a snow-capped mountain because I really don’t know why).

Looking at the clay, obviously Santoshi wasn’t impressed. We tried mixing red and green clay of Faber castell, expecting a ball of soft, brown clay but ended up with soft, ugly-looking grey clay.

Also, the soft clay didn’t hold any particular shape because it was just too soft. We tried to use a small bowl to hold the shape but no, it wouldn’t work.

Alright, now we were down to making something using the hard clay. I told her that I will help her with molding the hard clay. She decided to make a volcano instead of a mountain since we have brought orange clay.

In order to get a rigid structure, we used the top of a small bottle.

We wrapped this bottle top with hard clay and this is what it looked like (view from top):

Looked pretty neat. Yup, we didn’t have enough brown clay, so used some left over clay from the previous project (clay Ganesha).

Using acrylic paints, Santoshi painted the exterior using brown at first.

Then, we added strips of bright orange clay for lava and inserted a small amount of clay, roughly made into a ball, stuffed it in the bottle’s opening. (Sorry, no pics at this point).

Used some red, orange and yellow paint for lava (make sure to paint the interior of the bottle’s opening too). Tada, here is a miniature volcano made of clay :

Santoshi was quite happy with this!

So, that’s all for this post. Thanks for reading!

Bye!!

Bird cage – paper craft

Hello!

Santoshi had to recite a poem at school and marks will be awarded based on many criteria, one of which is props.

The poem was about a sparrow and a boy offers to make a silver cage for the sparrow. But the sparrow likes to fly free.

We (read I) decided to make 2 props – a bird cage out of paper and a drawing of a sparrow flying in the blue sky. As she is a talented artist, drawing became her responsibility.

I offered to make the cage using paper abs involve Santoshi in the making of it.

As usual, I turned to Google for ideas. Which led me to a couple of YouTube videos. I came up with my own version of a bird cage, keeping in mind the cradt items in my stash, time involved and more importantly, my ability to put the ideas into action.

These were the items used:

  1. Empty spool of cellophane tape
  2. Chart paper or card stock – to provide rigidity – any colour will do. I used black (left over after making the Halloween cat)
  3. Silver paper since the cage had to a soft cage for the poem.
  4. A length of string – used some yarn for hanging the swing inside the cage
  5. A piece of thicker card stock (used a packaging of Panasonic battery) for swing. Used this since the chart was not very thick.
  6. Glue
  7. A pair of scissors
  8. Ruler and pencil
  9. Thick, long needle to poke holes for the swing
  10. Cello tape

The spool is going to be the base. So, cover the entire spool in silver paper. The silver paper was very thin. So, had to cover the top and bottom of the spool with black chart before using the silver paper.

Using a pencil, trace the shape of the spool on the black chart (remember to trace on the outside rim. If you use the inside of the spool the trace, the circles will be smaller than the spool).

Repeat on the silver paper.

Cut to shape.

Add glue to the rim.

Align and stick the black chart first. Let dry.

Add glue to the black chart.

Align and stick the silver paper.

Now, let dry and repeat on the other side of the spool.

While the spool dries, let’s make a swing. I used a small strip from the battery package. Cover it with silver paper and let dry.

Now, it is time to make the rest of the cage.

Using a ruler and pencil, draw lines on the black chart to cut into strips (about 1 cm wide).

Cut them into individual strips.

Just so that the strips are silver on both sides, take each individual strip, paste one side on the wrong side of the silver paper.

Add glue to the side of the strip facing you, fold over and cut to shape. Repeat for each strip.

I made 6 strips (covered in silver paper). Four of these will be stuck to the side of the spool as the vertical bars of the cage. The remaining two will be bent to a circular shape.

Now, paste one end of strip to the side of spool and the other end of the same strip to the diametrically opposite side of the spool.

Add the bent strip about 3 inches above the base of the cage – this bent strip should be pasted to the inside of the bars. This will maintain the circular shape further up.

Add one more strip and using a piece of string or yarn, hang the swing from the top of the cage.

Add two more vertical bars to the cage. Align the other bent strip over the earlier one but this time, add it to the outside of the bars.

Cover the side of the base using silver paper. The spool is rigid enough that I didn’t have to use black chart.

The cage is ready!

Thanks for reading! Hope you like this post. If you have any feedback, please use the comments section! I’d love to hear from you!

Just to compensate for the bad quality pics, here is a picture of the sparrow drawn by Santoshi. 😀

1

Another year, another witch costume

Hello everyone!

This time my younger one decided to go to the Halloween carnival as a fairy. So, we used a frilly frock, bought a pair of wings which came with a hairband and magic wand. That was easy.

The elder one insisted on going as a witch. You may remember that the broom made for Anjana last year never made its way back home. This meant that I needed to make a new one for Santoshi.

Didn’t have much time. So I used the last year’s broom idea and made a few changes:

– the stick was way too thin. So, I put together 3 sticks and used cellophane tape. This made sure that any splinter from the stick didn’t bother Santoshi, apart from holding the sticks together.

– added a bow using a bright green satin ribbon

– made a cat using black chart paper. Created a rough free-hand drawing of a cat, coloured the eyes using crayons (made it hetero chromatic) and added thin strips for whiskers. Made a pretty bow out of a gift wrapper. Attached the cat to the broom by wrapping it around the broom. Used double-sided adhesive tape to hold it in place. The idea was to make it look like the cat is peeping out from behind the broom. I hope it looks that way.

Broom

A closer look at the cat

Bought a hat and a jack-o-lantern bucket at a local store. Also, added a purple apron to her black frock to add a dash of Halloween colour to the black frock.

There are many witches, but this one is mine!

This fairy too

Thank you so much for reading the post!

DIY oven from a carton

Hello!

Been quite a few months, isn’t it? We have another interesting diy item for this post. It is an oven. I was thrilled to do it!

My elder daughter volunteered for a show at school, which is nothing new. The school let’s us run around for costumes and props, which is also not new. What was new and terrifying is that she “volunteered” me to make something out of broccoli! That’s a different story though.

Apart from an apron and toque, we have to send cutting boards, plastic (blunt) knife, mixing bowl, etc. for the show. Santoshi wanted to take an oven with her. Since I always prefer making things out of cardboard and paper rather than cooking, I decided to make an oven for her.

The most difficult thing was to get the right sized carton. I went to my mom’s garage and came back with two cartons, neither of which would make the perfect oven. Then, my best friend at work got the right box for me. Let’s see how a carton was reshaped into an oven.

Things used:

  1. Carton
  2. Scissors and box cutter knife
  3. Glue and tape
  4. Old newspaper
  5. Plastic sheet
  6. Fabric paint – silver and black
  7. Flat brush

Here is the box :

The box is going to be turned over – the lid will be facing us and about will open outwards from top to bottom.

Draw a line to roughly divide the lid into 80:20 ratio.

Cut along the line.

Using an sheet of paper, mark and cut a rectangle out of the centre of the lid.

It will look like this :

Now, wrap the outside of the oven and lid.

Paint it all black!

Well, not everything black – paint the door (openable portion of the lid) in silver. The silver paint was translucent. So I gave a coat of black first and then silver on top after the black paint had dried.

Add the plastic sheet from the inside. I added glue first, placed the sheet and then secured it with tape too.

It should look like this from the outside :

Now, glue the oven and door together at the base of the door and the throughout the side of the black portion next to the door.

We need a couple of dials next to the door to make it a little more realistic. Using the rectangle cut out of the lid, cut 2 stripes – about 1 inch in width and 5-6 inches in length.

Cut them into small squares, stack them up and secure using tape or glue. I used tape.

Cut 2 circles for dials. (No picture, sorry). Glue the stack to the black portion of the lid. Now, stick the dials to the stacks.

Here is your oven (closed):

Open Sesame!

Whew, that came out well!

Thanks for reading! Hope you liked the post. Please leave a comment!

Bye!!

1

DIY Frozen Anna Cloak

Hi!

It’s that time of the year again where the kids want to dress up. Nope, not Halloween! It is the annual fancy dress competition at the local play centre.

Since I made a costume for my younger daughter Anjana (Little red riding hood), it was absolutely necessary that something was made for elder one too, even though the frock would have been enough.

So, I promised to her that I will make a cloak for her to go with this frock. I had promptly assigned the task of buying fabric to my mother (my very own Superhero who rescues me all the time). Unfortunately, Santoshi tagged along with my mother for this trip. Which meant that the fabric will be in purple colour

1

DIY Little Red Riding Hood costume

Hello after a long time!

The last few months have been a bit busy for me and my focus was on reading abs podcasts – do visit Digital Amrit for book reviews.

Coming back to the costume, both my daughters wanted to participate in the fancy dress (dress up) competition in the local play centre. It is an annual thing (last time it was Pongal pot and Christmas tree).

After thinking long and hard and going through the kids wardrobe and the stash of fabrics (that I carry for no reason), I found the Anna frock (which was bought almost 2 years back). Luckily, it still for my elder daughter Santoshi. So, her costume was settled – though I had to make a cloak for it.

Now for Anjana, I had to do more thinking (beep beep) and I ended up with Little red riding hood – chosen by Anjana (yup, I believe in democracy so long as it is convenient and switch to dictatorship when the going gets tough). The costume seemed easy enough – a pretty frock, a basket with cookies but the hood? Turned to my guru Google who promptly directed me to here thank you Google and my sincere thanks to Meg and Steph for the tutorial.

Here is what I used:

  • 1 Metre of red velvet fabric
  • A small piece of yellow cotton fabric for the lining (only for the hood)
  • A small length of red fabric as ribbons

I pretty much followed the tutorial to the t, except that I used ribbon instead of a clasp.

On the d-day, Anjana was like :

Unlike the other costumes, Anjana was thrilled about this costume! I had made it about a week in advance and she just couldn’t wait to put this on.

Thanks for reading my post!

0

DIY Pencil Costume for kids

Hi everyone!

About ten days back, I received a phone call from my daughter Anjana’s school. The teacher told me that Anjana will need to be dressed up as “<I-couldn’t-hear-what-the-teacher-was-saying>” , that she has written a note in the diary and that I had to meet her at 9 am the next day. It was school dispersal time, so you can imagine the decibel levels in a kindergarten classroom. Making sure that each kid is picked up by the designated pick up person is an essential duty of the teachers and I did not want to take more of her time.

The note said that Anjana will be on stage as a pencil for the Science Day Celebration at school. Wow, pencil! Images of all kinds of cute and colourful pencils went through my head, I was elated. Unfortunately, Google let me down this down. No proper tutorial on pencil costume – at least, not the kind that I was looking for. Most of the images were kids wearing tshirts and leggings with pencil-tip hat on their heads. Not good, not at all. Others were costumes which I could buy online but they looked horrible. No words to describe the horror of some of the images that I wish I could unsee some of the images.

In the meanwhile, fancy dress competition came up and I spent my energy and time of those costumes plus my elder daughter’s theatre showcase for which we had to spend considerable time and effort on hiring the costume and taking her for the rehearsals and the show. All of these pretty much ate up most of the weekend space that I had. Now, with one weekend left, I had to make a pencil and I was still clueless.

Cursing my stars, I tried to mentally visualise what kind of thing would be easy to buy, easy to work with, light enough to be worn on stage and yet be sturdy enough to be withstand the handling of a 4-year old. Bending a sheet of store-bought cardboard will be disastrous because they are not meant to be bent. I used to be a hoarder of cartons until recently. After renovating the house, I felt the need to throw out useless (but sturdy and perfect-sized) cartons (mostly Amazon pantry delivery boxes – though their packing tape stinks – literally stinks – the boxes are unmatched in quality). So, now I was left with nothing.

Luckily, I acquired a JK Copier Paper box which had to do the trick. The box was about 12 inches in width – an inch more than Anjana’s width, lol!

img_0706

Apart from the box, I used the following:

  • Fevicol (glue) and Fevikwik (superglue)
  • scissors and box-cutter
  • bright colour paper (neon pink and neon yellow) – OR newspaper, paint and brush
  • gold and beige colour gift wrapper
  • black chart paper
  • brown tape
  • a circular plate for outlining
  • strings / ribbons

I did not click a lot of pics during the process because unlike the other costumes, I did not have the finished image in mind while doing this. So, I was doing my signature thing – making up as I go. I have included pictures below to explain how this was done.

Box

The box will be covering the torso while the lid will be mounted on the box for the head and above. Let’s start with the box first.

Box - bottom1

With the base (or bottom) facing up, leave the left side (flaps attached the to side of the box) intact. Open up the flaps on the right side of the box. It will look like this:

Box - bottom

Now, the left side of the box (left intact) will be placed on the child’s shoulders. So, cut out holes on the sides on the box:

Arm hole

The step above is for the right arm. Now, repeat it for the left arm.

Armholes done, it is done to cut the box for the neck part.

Neck

Keep the box aside and take the lid and reorient it:

Lid

We will be cutting out a circle for the face. Make sure that you leave a couple of inches gap for the neck:

Face

I do have a pic at this point – when I first drew the circle for the face, I forgot to leave some space for the neck. Thankfully, I remembered before cutting it – that’s why you see multiple circles. After cutting the circle out, just below the circle, cut open the flap – this will ensure that the flap does not scrape against the child’s neck. It also helps in gluing the lid to the box.

Now, mount the lid on the box. The lid is (obviously) a bit wider than the box. So, fold the lid a bit at the sides to match the width of the box. Secure this assembly using superglue or regular glue and tape. Or, heavy duty stapler, if you have one.

mounted

At this point, I started covering this thing with bright coloured paper. Be sure to cover the sides too. I had bought 4-sized colour paper and it took a lot of effort to the paste them on to the pencil. When I was almost done, I realized that I could have pasted old newspaper all over and painted it with whatever colours I wanted. It would have had lesser joints than what the pencil currently had!

Now, the tip of the pencil. The box was fully used up for the above. So, I used an Amazon delivery carton for the tip. My first attempt in attaching the tip to the top of the pencil failed miserably (not pictured here). So, I made the tip using this shape:

pencil tip

Before sticking the tip to the pencil, cover the tip also with the colour paper. I use a beige colour paper for the entire tip, then stuck black to the pointy end on top (sharpened graphite lead) and a wavy-edged pink (sale colour as the pencil) for the rectangular part.

Using superglue, stick the tip to the pencil. Since I am unable to explain using words, please see the pics below: Place the tip on the pencil aligning rectangle A over rectangle B – bring green rectangle denotes the overlap. This way, the tip will start to taper from the top of the pencil.

pencil top overlappencil top overlap1

Well, almost done now.

Since the colour paper joints were showing up, I used strips of gold paper as accents to cover up the mess. With that done, using a ruler and a pencil (or a stencil if you have one), cut out “HB” in the black paper and stick them sideways towards the bottom end of the pencil.

One last step and we have it ready: tie one end of each ribbon to the armhole so that the loose ends of the ribbons can be wrapped and knotted behind your child’s back.

img_0711-e1550999075662.jpg

With Anjana inside:

img_0712

Yup, you guessed it right! She does not like the costume. But, this is what she will have to wear for the show.

Thanks for reading this long post. Bye!